As with other geometry in Softimage, guide hairs can be scaled, translated, and rotated using the standard tools found in the Transform panel. For rotating, you have additional options using the commands in the Rotate menu on the Hair toolbar.
Select the hair strands, tips, or points on the hair object (don't select the hair object itself).
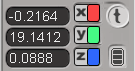
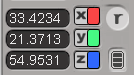
Select the appropriate Translate tool (X, Y, Z) on the Transform panel.
Drag the mouse along the axis you want to translate.
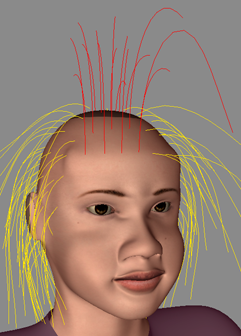
Here, the selected guide hair strands (in red) are being translated in the Y direction.
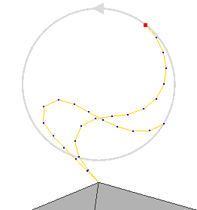
The selected elements move in the direction you drag. When you move the tips, the results are similar to moving the effector on a multi-segmented IK chain.
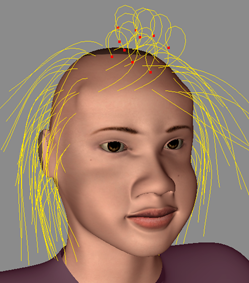
Here, the selected guide hair tips (in red) are dragged into position as you would the effector on an IK chain.
You can rotate hairs in two different ways: with the regular Rotate tool on the Transform panel or with the Rotate tools on the Hair toolbar. Note that points on the hair may not always rotate in a perfect arc because of the way the fixed-length segments on the guide hairs are connected.
To rotate hairs, use either of these tools:
Select the hair strands, tips, or points, then select the appropriate Rotate tool (X, Y, Z) on the Transform panel and drag the mouse.
Select the hair tips or points, then choose a command from the Rotate menu on the Hair toolbar:
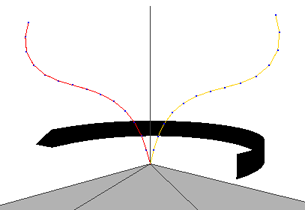
Around Root rotates strands, tips, or points around their roots perpendicular to the emitter object's normal. Drag the mouse to the left or right: the farther you drag, the more the points are rotated.
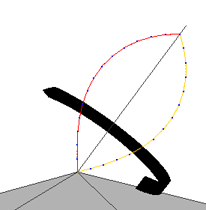
Around Tip rotates points around a vector from the root to the tip. This is useful for setting the orientation of a strand. Drag the mouse to the left or right: the farther you drag, the more the points are rotated.
Around Cursor rotates tips or points around the initial mouse pointer position in the viewing plane. In a viewport, click at the point around which you want to rotate the hairs, and then drag the mouse to the left or right. The farther you drag, the more the points are rotated.
Scaling hairs using the Scale tool on the Transform panel works on hair as it does on any geometry component, such as points. However, if you want to change the length of the hair, use the Hair Scale tool on the Hair toolbar (see Scaling the Hairs).
Select the hair strands, tips, or points on the hair object (don't select the hair object itself).
Select the appropriate Scale tool (X, Y, Z) on the Transform panel.
Drag the mouse in the direction you want to scale.
The selected hair components move in the same way that scaling moves other object components, such as points on a polygon mesh. The hair strand (and each segment of the hair) does not change length.
 Except where otherwise noted, this work is licensed under a Creative Commons Attribution-NonCommercial-ShareAlike 3.0 Unported License