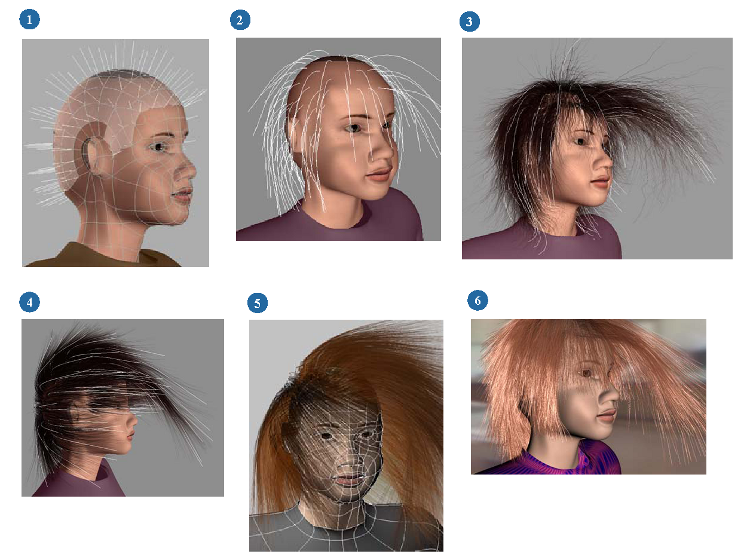
This overview shows how to set up a hair simulation. See the steps following it to find out where to get more information.

| 1 |
Apply hair to an object or cluster — see Creating Hair. |
| 2 |
Style the guide hairs — see Styling and Animating Guide Hairs. |
| 3 |
View and set up the render hairs — see Getting the Look with Render Hairs. |
| 4 |
Apply dynamics and forces for hair movement — see Styling and Animating Guide Hairs and Forces [ Simulation and Effects]. |
| 5 |
Select obstacles for collisions — see Setting Up Hair Collisions. |
| 6 |
Adjust the default hair shader or apply another one — see Rendering Hair. |
 Except where otherwise noted, this work is licensed under a Creative Commons Attribution-NonCommercial-ShareAlike 3.0 Unported License