Phonemes are units of sound, but what matters the most in animation is what you can see: that's where visemes come in. Visemes are the visual representation of these sounds, rather like visual phonemes. Each viseme represents a mouth shape: the animation controls on the face are positioned to create the correct mouth shape for one phoneme and are then saved as an action pose (an action source that has no animation). These poses are the same as standard pose files that you use in Face Robot.
Face Robot provides you with a basic library of viseme poses that you can use on your character's face. The mouth shapes for the visemes are based on phonemes that use the standard International Phonetic Alphabet (IPA) syntax for US English and for Japanese.
|
|
|
The best way to start out with lip sync is to create your own library based on the Face Robot viseme library and then edit and replace the poses as you like.
You could also duplicate any existing viseme library, delete all of the poses in that folder, then use the Visemes property editor to save each of your own poses in the list with the correct naming that uses the IPA phoneme syntax.
Basic steps for working with visemes:
Select the viseme library — see Selecting the Viseme Library.
If you're using the Face Robot library, you need to create a new library using it as the base — see Creating a New Viseme Library.
Import the visemes from the library to apply them to the character's face — see Importing Visemes.
Edit viseme poses and/or create variations of them as you like — see Editing the Viseme Poses and Creating Variations of the Visemes.
Create corrective shapes for the visemes at any point as you like — see Creating and Blending Corrective Shapes for the Visemes.
Face Robot provides you with a basic library of 38 viseme poses that you can use on your character's face. The visemes are based on phonemes that use the standard IPA syntax for US English and for Japanese. Face Robot recognizes these phonemes and automatically maps them to the appropriate viseme when you generate the lip-sync animation.
The visemes in the Face Robot library are read-only, so you need to create a new viseme library based on the Face Robot library and then edit the copied visemes. Working this way is recommended because Face Robot needs to make sure that all of the visemes that are available in this library are accounted for when you generate the lip-sync animation. If you create your own library that is missing visemes or have incorrectly named visemes, Face Robot cannot produce as favorable results.
The first step in working with visemes is to select a viseme library. If you're starting out with lip sync in Face Robot, you should select the Face Robot viseme library; otherwise, select the library that you want.
You can easily create a new viseme library based on an existing one. If you selected the Face Robot library, you need to create your own viseme library based on it because the visemes in the Face Robot library are read-only. Once you have created your new library and imported it, you can edit and replace the viseme poses as you like.
Click the Create New Library button in the Visemes property editor.
In the Create New Library Dialog Box that opens, select the viseme library you want to copy in the Source Library text box.
Select the Copy Viseme Files option to copy the visemes from the Source Library into the Destination Library.
Select the name and path for the new viseme library in the Destination Library text box.
Click OK to create the new viseme library.
Face Robot checks that the library is valid and contains all required viseme poses. If there are missing viseme poses, they have a <not defined> tag next to their name in the phoneme list in the Viseme dialog box, and the phoneme clips in the Lip Sync view are highlighted in red.

Once you've created a new viseme library, or want to import viseme variations, you need to import them into the Face Robot model. Only the visemes in the currently selected library are imported. Remember that your original viseme library is stored externally (in the Destination Library location): importing simply stores these visemes in the scene so that it's easy to apply them to the Face Robot head.
In the Import Visemes dialog box that appears, select which visemes you want to import:
Normal Variation Only or current Variation Only imports only those visemes tagged with the _Normal or _current variation suffix.
For example, if you have created an "Elvis" variation, you can choose to import only those visemes by selecting this option.
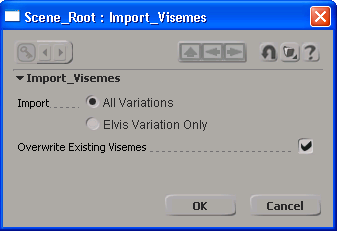
If you select Overwrite Existing Visemes, any viseme poses of the same name in your head model's Mixer > Sources > Visemes folder will be overwritten with these visemes. Note that this doesn't affect the viseme poses in your current library, which is stored externally.
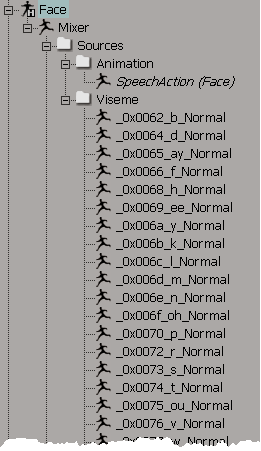
Click OK and the viseme poses are imported into the head model's Mixer > Sources > Visemes folder. You can use the explorer to see them.
If there are some missing viseme poses, the phoneme clips in the Lip Sync view are highlighted in red.
Each viseme is the position of the animation controls saved in a pose that forms the mouth speaking the sound of a certain phoneme.
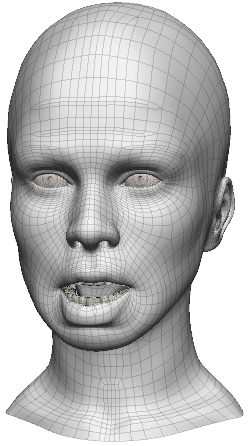
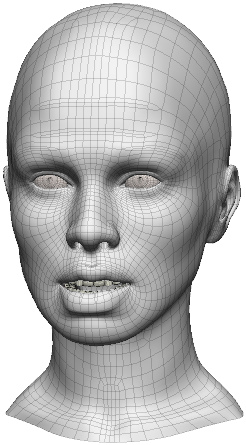
While many of the default visemes work well, you may need to adjust the mouth shape to make certain phonemes look better. For example, the lip corners for the "ee" phoneme (in the image below on the left) needs to be widened a bit (in the image below on the right) because the character tends to speak in a slightly more emphasized manner.

|

|
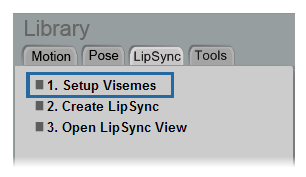
Select LipSync  Setup Visemes from the Library panel.
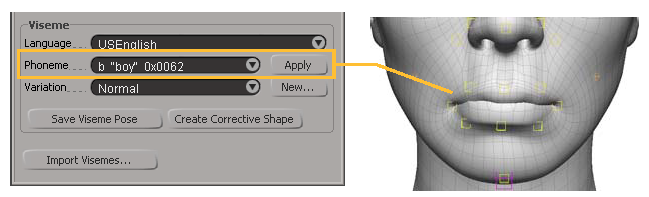
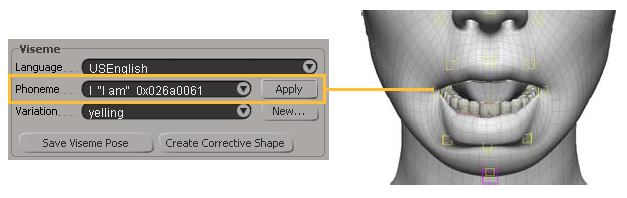
In the Visemes dialog box, select a Phoneme from the list and click the Apply button. The animation controls on the face take on the pose for that phoneme.
Move and rotate the animation controls into the position you want.

If you want to return to the original mouth shape, simply click the Apply button again before you save it.
Click the Save Viseme Pose button. This overwrites the existing viseme in the current library with the changes you've made.
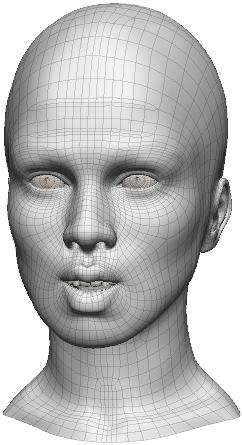
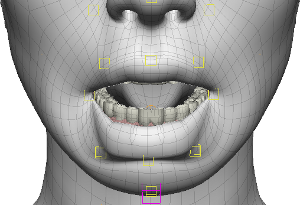
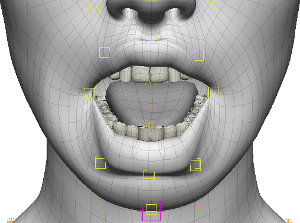
Sometimes a character needs some special visemes in addition to the normal visemes that are part of the library. For example, your character is yelling in some parts of the dialogue, so you need to create some "open mouth" variations of the standard visemes (as shown in the image below on the left), or your character has a speech impediment or is imitating another character. Anything that changes the mouth shape from the normal visemes is considered a variation.
|
|
When you create a variation of a viseme, the whole viseme library upon which it is based (such as Normal) is copied and saved in the same folder as your current library. Each variation viseme has the Variation name as a suffix. You can then import the visemes variations in the same way (or at the same time) that you import the viseme library.
For example, if you're working with a library in [project]\Visemes\Alien and wanted to add "Extreme" variations to all or some of the visemes, they would be saved as _Extreme (such as 0x0062_b_Extreme) along with the _Normal ones (such as 0x0062_b_Normal) in the same viseme library.
You can substitute these variation visemes used for each phoneme in the Lip Sync view—see Switching Phonemes and Variations.
In the Visemes dialog box, do either of the following:
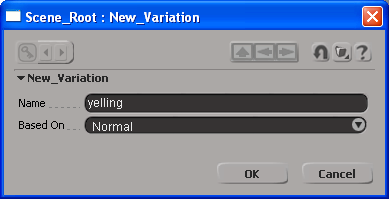
Click the New button to open a dialog box in which you can enter the name of a new variation to be added to list of variations.
For example, if you enter "yelling" as the Variation name, the viseme names will have this as a suffix (such as 0x026a0061_I_yelling) when you import the visemes.
Select an existing Variation from the list and click the Apply button to apply that viseme variation of the phoneme.
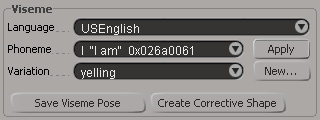
Select a Phoneme from which you want to create the viseme variation and click the Apply button. The animation controls take on the pose for that phoneme.
Move and rotate the animation controls into the position you want for this variation.
Click the Save Viseme Pose button. This saves the viseme variation in the current viseme library using the variation suffix name when you import the visemes.

Import the viseme variations as described in Importing Visemes.
 Except where otherwise noted, this work is licensed under a Creative Commons Attribution-NonCommercial-ShareAlike 3.0 Unported License