Deformations are powerful modeling and animation tools. You can apply deformations to objects such as polygon meshes, surfaces, and surface meshes, as well as to hierarchies and clusters of components. You can also apply deformations to lattices, particle clouds, and hair.
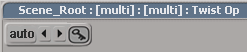
You can apply deformations to multiple selected objects. For example, you can select several surfaces and apply a Twist deformation. Each surface gets its own Twist operator, but they can all be controlled from the same Twist property editor — the title bar says "multi" to indicate a multiple selection.
You can still open each object's individual Twist operator from its construction history and adjust parameters separately from the others.
You can reopen all the Twist operators and control them together by selecting them all in an explorer and pressing Enter.
An object with a hierarchy provides more possibilities for deformation animation than a single object. You can apply the deformation on the parent selected in branch mode (middle-mouse button) or tree mode (right-mouse button), in which case the deformation is transmitted to its children as if the hierarchy were a single piece.
All objects in the hierarchy share an instance of the same deformation operator. Opening the property editor from the construction history of any object and modifying parameters affects all objects in the hierarchy, and deleting the operator from any construction history deletes it from all of them.
Removing an object from the hierarchy removes the deformation from it, and adding a new object to the hierarchy applies the deformation to it.
Like a hierarchy, applying a deformation to a group applies it to all members of the group. They all share an instance of the same deformation operator. Opening the property editor from the construction history of any member and modifying parameters affects all members, and deleting the operator from any construction history deletes it from all of them.
Adding an object to the group applies the deformation to it, and removing an object from the group removes the deformation.
Many deformations allow you to use a parameter map to control the amplitude or strength. For example, you could use a Push deformation with an image to emboss an object. For more information about parameter maps in general, see Parameter Maps [Scene Elements].
In particular, if you apply a deformation when a cluster's weight map is selected, the weight map is automatically used to modulate the deformation's amplitude. Note that this technique does not work with all deformations, but in those cases you can still connect a weight map manually.
With a cluster's weight map selected, choose a deformation from the Modify  Deform menu on the Model toolbar.
In the deformation's property editor, adjust the parameters as desired.
After you have applied a deformation on a weight map, you can select the weight map again and then press W to add more paint strokes.
A quick way to select the desired weight map is to select the object, then choose Explore Property Maps from the Select panel and select the map to paint on.
Deformations are applied as operators in the operator stack. If you do not freeze the operator stack, you can go back into the history and modify the deformations parameters — the changes percolate up through the history and are reflected in the deformed object.
Once you are satisfied with an object, you can freeze the operator stack. This discards the history and keeps only the current shape of an object, saving memory and computation time for updates.
For more information about modifying, reordering, collapsing, and freezing deformation operators, see Operator Stack.
If an object has an implicit texture projection defined after a deformation, it will slip when the object is deformed. You can reorder the texture projection and deformation operators as described in Changing the Order of Operators. For more information about texture projections, see Applying and Editing Textures [Texturing].
Objects with deformations are displayed with a letter D in the schematic view.
You can mark and animate many deformation parameters directly. The procedure is exactly the same as for any other animatable parameter and is described throughout the Animation guide. This allows you to create very simple shape animation, like an animated twist. (Of course if you freeze the operator stack, the animation is lost.)
In addition to animating deformation parameters directly, there are other tools for animating shapes:
Shape animation using the animation mixer is described in Animating Shapes [Shape Animation].
In particular, you can deform an object based on the orientation of another object or any other parameter as described in Linking a Shape Deform to Poses or Orientation [Shape Animation].
Soft body dynamics let you simulate the behavior of non-rigid objects as they are subjected to forces and collisions. It is described in Soft Bodies [ Simulation and Effects].
Cloth lets you simulate how fabric moves and drapes. It is described in Cloth [ Simulation and Effects].
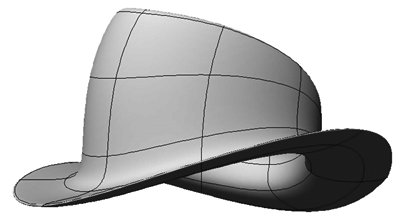
Objects with large or long polygons might not deform smoothly. You can create smoother deformations by adding more geometry, or by using subdivision as described in Subdivision Surfaces [Modeling].
 Except where otherwise noted, this work is licensed under a Creative Commons Attribution-NonCommercial-ShareAlike 3.0 Unported License


