


When you create a command, it becomes available to be added to a toolbar, mapped to a key, or used in scripts.
You create a non–self-installing commmand by dragging a script to a custom toolbar as described in this topic. This is a simple method that does not provide many options, but it may be useful for beginners or for a quick solution.
However, it is recommended that you create self- installing custom commands instead. See the Custom Commands [SDK Guide].
If you want to add a custom command to other toolbars, see Adding Commands to Toolbars.
If you have already created a command for a script and you drag the script instead of the command onto a second toolbar, then you are creating a second command and must provide a unique command name for scripting. This means that different commands are logged when you click on the different buttons.
Make sure that a custom toolbar (or a toolbar tab in a shelf) is displayed.
To display an existing custom toolbar, choose it from the View  Toolbars menu on the main menu.
For more information about custom toolbars in general, see Toolbars and Shelves.
Select one or more lines in the history or editing pane of the script editor and drag them onto the custom toolbar.
Note that text dragged from the editing pane is removed. To leave it in place, Ctrl+drag it onto a toolbar instead. You can also drag text from any program that supports drag-and-drop actions on Windows.
Note also that when dropping text onto a toolbar, if the text ends with ".preset" and the preset file can be loaded, then Softimage assumes you are creating a button for a preset. In all other cases, Softimage assumes you are creating a button for a script.
Drag a saved script file from a browser onto your toolbar. On Windows, you can also drag from a folder window.
Drag a link to a script file from a Netview onto your toolbar.
When prompted, choose Script Command (external file) and click OK.
The Add Script Command dialog box opens.
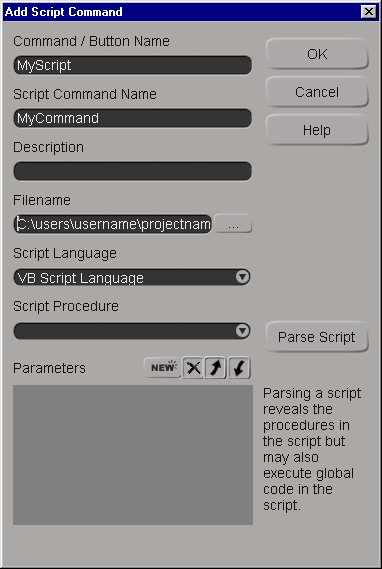
Specify a Command/Button Name for the script. This is the text that will appear as a label on the button.
If you dragged lines from the script editor, the default command name is of the form Scriptnumber; if you dragged a saved script file, the default is the file name.
Specify a Script Command Name. This is the name that gets logged to the command history when you click the button.
You can also use this name to invoke your custom command from within another script. The command name for scripting cannot use spaces or punctuation.
You can also provide a brief Description. This description is displayed in the Customize Toolbar dialog box if you later add the command to other toolbars as described in Running Commands from Custom Toolbars. It is also displayed in the Keyboard Mapping dialog box — see Running Commands from Keys.
Specify the file name for the script, including the path. If you dragged lines from the script editor, a default file name is supplied. If you dragged a script file, it is copied to the location and file name you specify.
If necessary, select the scripting language from the pop-up list in the Language box. The box lists the supported languages that are installed on your computer.
If you dragged lines from the script editor onto the toolbar, the default language is the one specified in your preferences.
If you dragged a saved file, the default language is based on the file name extension: .vbs for VBScript, .js for JScript, .pls for PerlScript, and .pys for Python ActiveX Scripting Engine.
If your script does not contain any procedures, there is nothing more to do — click OK to close the Add Script Command dialog box and add the button to your toolbar.
If your script does contain procedures and you want to call them instead of global code (that is, script fragments that appear outside of a discrete function or subroutine), continue with the rest of these steps.
This parses the script and finds the procedures and arguments.
If your script contains procedures, you can specify which procedure to execute when the button is clicked. Select the desired procedure from the pop-up list in the Script Procedure box.
If you do not specify a procedure, only global code (script fragments that appear outside of a function or subroutine) is executed, as well as any procedures that are called from global code.
If the selected procedure contains arguments, they are listed under Parameters. For each argument, enter a value in the corresponding Value box. This value is used when you click the button to run the script.
For some scripting languages, such as PerlScript and Python, you need to add parameters manually.
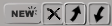
You can use the New button to add a parameter to the Parameters list.
To change the order, select a parameter and click the arrow buttons. To delete a parameter, select it and click the delete button (X).
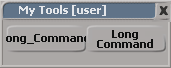
Click OK. The Add Script Command dialog box closes and the new button is added to your custom toolbar.
 Except where otherwise noted, this work is licensed under a Creative Commons Attribution-NonCommercial-ShareAlike 3.0 Unported License