Using the tools and operators described in the previous chapter, you can build effects quickly and easily. Once you open the FxTree, you can start importing images, image clips, and/or render passes. Then you can connect the image operators to compositing and effects operators to create your composites and effects. If necessary, you can apply mask and/or garbage mattes to operators to limit the areas to which they are applied.
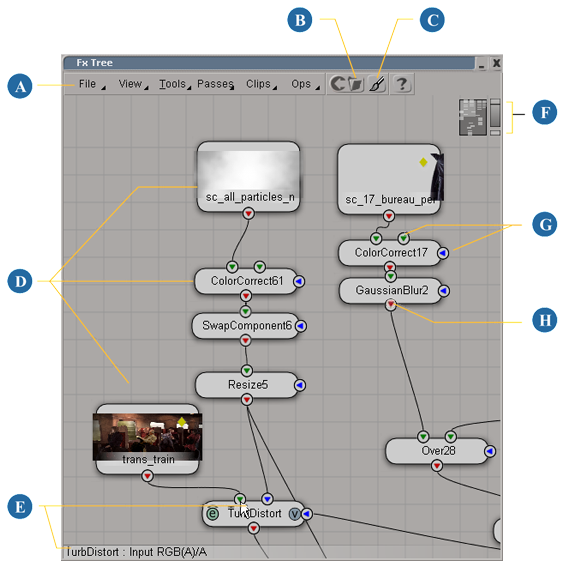
Once you've finalized your effect, you can render it and output it to a number of different file formats. At any point, of course, you can preview an operator in the Fx Viewer.
Before you begin building effects, you may want to adjust the Fx Tree's image defaults to conform to your chosen picture format. The image defaults affect all operators that create an image (the Pattern Generator operator, for example), and are applied when you opt to output an operator with the default size, and/or bit-depth (for more information about operator output options, see Setting Operator Output Options). Each tree that you create has its own set of preferences.
From the FxTree menu, choose File  Properties. The FxTree properties property editor opens.
Set the following options, as needed:
Width/Height: specifies the default size of images imported into or created in the FX tree.
Default Bit Depth: specifies whether operators should be processed at 8 or 16-bit depth.
Pixel Ratio: specifies the default pixel ratio for operators in the FX tree. Set this to match your chosen picture standard's pixel ratio.
Use Pixel Ratio in Effects: when activated, all effects are processed using the default pixel ratio.
Alternatively, you can click one of the buttons in the Presets section to automatically set the default image parameters to the correct values for the corresponding picture standard.
Importing images into the FxTree creates a File Input operator for each imported image. The operator points directly to the image on disk without creating an image source or clip.
When you import an image, the File Input operator's properties are automatically updated according to the image's properties.
Click the Import Images button  in the FxTree menu bar. A browser opens from which you can select an image to import.
Choose File Import Images from the FxTree menu bar. A browser opens from which you can select an image to import.
Use a browser to locate the image and then drag-and-drop it into the FxTree. This creates a File Input operator.
Use the Operator Selector (see Getting Operators) or choose Ops Image File Input from the FxTree menu to place an image operator in the FxTree. Then open the operator's property editor to select an image
source (see Setting File Input Properties).
In the FxTree, you can import render passes the same way that you import image clips. A File Input node is created for each pass that you import, and the file name, start frame, and end frame are all based on the pass render options. The file extension is based on the pass' image format and output channels.
You can import one pass at a time, or every pass in the scene all at once.
Softimage Illusion has direct access to all of the image clips in your project. Inserting image clips into the FxTree creates a pair of Image Clip operators for each imported clip.
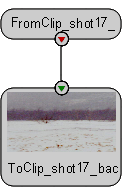
Image Clip operator pairs consist of two operators:
You can modify the image clip itself by adding effects operators between the Clip In and Clip Out operators. This updates the clip wherever it is used.
When you insert a blank File Input operator into the FxTree, you need to edit its properties to get a source image. Once the image is imported, its other properties are updated based on the image's characteristics. You can modify these properties as needed to change what the File Input operator outputs.
Select the File Input operator whose properties you want to edit.
Move the mouse pointer over the operator to display the View and Edit hotspots. Click the Edit (green) hotspot to open the operator's property editor.
Choose a Type and Bit Depth for the Image.
If the Type is set to Alpha, you can activate the Create Alpha from Luminance option to output a matte created from the image's luminance.
If necessary, adjust the operator's source range, as described in the next section Defining the Source Range.
If necessary, adjust the operator's post-processing options, as described in Setting Post-Processing Options.
If necessary, apply some extrapolation to the operator, as described in Applying Extrapolation (Black Frame, Hold, Cycle, Bounce).
A file input operator's source range is the range of frames that are used during playback. You can change this range to play only part of a sequence (frames 10-50 of a 100 frame clip, for example), or to extend a still image over several frames. A sequence's source range is the entire sequence, from the first frame to the last, while a still image's source range is, by default from frame 1 to 100.
On the File Input tab, or the Timing tab, change the Start and End Frames to alter the duration of the image as needed.
From the Timing tab, you can also specify an Start Offset to offset the source range.
For example, an offset of 10 means that the source range will only begin playing back at the scene's 10th frame.
If desired, you can reverse the image's frame order by activating the Reverse Footage option.
The options on the Post-Processing tab of the File Input property editor allow you to apply a variety of different operations to different types of images. You can set the following options as needed:
Automatic Delog (Cineon/DPX Files): if you are using a Cineon/DPX image, activating this option automatically converts it from logarithmic color space to linear color space.
Un-Premultiply Image on Load: activating this option automatically un-premultiplies images when you load them.
HDR and OpenEXR options: these options are only applicable when you're working with high dynamic range images saved in the .hdr or .exr formats.
Exposure: if the image format is .hdr or .exr, this setting offsets the exposure to brighten or darken the image.
The exposure value is measured in f-stops, so a value of 0 is the image's default exposure, while non-zero values offset the default by the specified number of f-stops in either direction.
Display Gamma: if the image format is .hdr or .exr, this setting performs a gamma correction for display purposes only.
For more information about working with OpenEXR high dynamic range images, see Working with OpenEXR HDR Images in the Fx Tree.
Extrapolation determines how a file input operator's animation is extended to the frames before and after its source range (the range of frames between the operator's start frame and end frame. See Setting File Input Properties).
You can apply any one of the following types of extrapolation to a file input operator:
Black Frame: all frames before/after the first frame of the source range are output as completely black frames with an Alpha value of 0.
Hold: holds the first/last frame, as specified in the source range, for a specified number of frames before the Start/End frame is reached.
Cycle: repeats the source range for a specified number of times before the first frame or after the last frame.
Bounce: repeats the source range forward, then backward, and so on for a specified number of times before the first frame or after the last frame.
You can apply extrapolation to a file input operator from its File Input property editor, or interactively using the animation mixer.
Select the File Input operator whose extrapolation you want to edit.
Move the mouse pointer over the operator to display the View and Edit hotspots. Click the Edit (green) hotspot to open the operator's property editor.
On the Timing tab, you can set the extrapolation Before and After independently meaning that you can have extrapolations before and/or after the image or sequence.
To display a black frame with an alpha value of 0 before or after the source range, set the Type to Black Frame.
To hold the first or last frame of the source range, set Type to Hold and enter the number of Frames.
To cycle the source range, set Type to Cycle and enter the number of Cycles.
To bounce the source range, set Type to Bounce and enter the number of Cycles.
In the Fx Tree, select the File Input operator whose extrapolation you want to edit.
Move the mouse pointer over the operator to display the View and Edit hotspots. Click the Edit (green) hotspot to open the operator's property editor.
Press Alt+0 to open the animation mixer, or choose View Animation Animation Mixer from the main menu.
All of the file input operators in the scene are displayed in the animation mixer.
See Displaying Clips with Thumbnail Images [Nonlinear Animation] for more information.
In the animation mixer, locate the operator's clip, click its corners and:
You'll see the start/end information on the clip update as you do this.
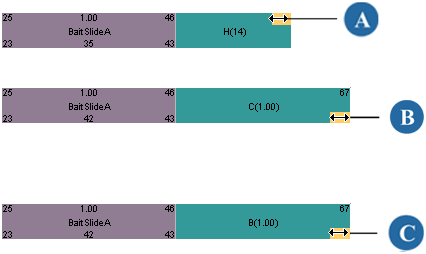
| A |
Drag on upper corner to hold. |
| B |
Drag on lower corner to cycle. |
| C |
Press Ctrl+drag on lower corner to bounce. |
Softimage Illusion provides basic support for 16-bit floating-point OpenEXR HDR images. The nodes that preserve HDR information are:
The blurs and most of the other effects in the Filter group.
The various R, G, and B channel controls in the Basics and RGB Graphs pages of the HSV Adjust operator.
Other nodes, including Painterly Effects, Keyer, Tracker, Paint, and so on, clamp HDR information.
You can connect operators in the FxTree by dragging from one operator's output to another's input. Once the connection is established, a connection line appears between the operators. You can also use the operator selector to pre-connect new operators to existing operators in the FxTree before inserting them.
Click the source operator's output icon and drag to the appropriate input on the destination operator.
When a small square appears around the destination operator's input, release the mouse button.
From the FxTree menu, choose View Operator Selector to open an Fx Operator Selector.
In the Operator Selector view, click the operator that you want to insert.
The operator is highlighted and its inputs and outputs are listed.
Notice that the first of the operator's inputs is also highlighted. In the FxTree, middle-click the operator that you want to connect to that input.
The name of operator that you selected is listed next to the input and the new operator's next input is highlighted.
Repeat steps 1 and 2 until you've prepared all of the new operator's connections.
If you don't want to connect anything to a particular input, skip over it by clicking a different input.
When the connections are prepared, middle-click an empty area in the FxTree to insert the operator. The connections are made automatically.
You can cut, copy, and paste one or more operators in the FxTree. When you copy an operator, all of its properties are copied as well so operators that you paste into the FxTree have the same settings as the originals. This is useful when you want to reuse the same effect in several places. You can paste copied operators into the same FxTree, or from one tree to another.
Press Ctrl+C to copy the selection or Ctrl+X to cut it (and copy it to the clipboard).
Alternatively, you can right-click a selected operator and choose Copy or Cut from the menu.
Press Ctrl+V to paste the selection into the FxTree workspace.
Alternatively, you can right-click an empty area of the FxTree workspace and choose Paste from the menu.
Each operator has its own property editor in which you can adjust its parameters. There are several ways to access an operator's property editor.
Double-click the operator in the FxTree. This opens the operator's property editor and displays the operator in the Fx Viewer.
Alternatively, you can right-click the operator and choose View & Edit from the menu.
Move the mouse pointer over the operator to display the View and Edit hotspots. Click the Edit (green) hotspot to open the operator's property editor, or Ctrl+click it to edit the operator without opening its property editor (this is useful when working with paint operators).
Once clicked, the Edit hotspot remains visible (although slightly smaller) on the operator as long as the operator's property editor is open. This lets you keep track of which operator is currently being edited.
Alternatively, you can right-click the operator and choose Edit Properties from the menu.
Locate the operator's node in the explorer. Click its icon to open its property editor. Operator nodes are stored under their respective FxTree nodes.
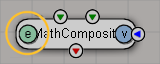
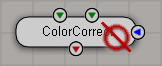
You can mute most operators so that their effects are not displayed. This is the same as turning the operator off so that it no longer affects its input image. You can mute an operator from its property editor or from the FxTree.
When an operator is muted, a slashed circle icon appears on its node in the FxTree.
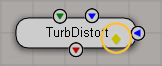
By default, the FxTree tries to cache all rendered operators, first to RAM and then to disk, in order to keep playback delays to a minimum. Frames are cached when you paint on an operator or edit its properties, requiring that the operator's effect be reprocessed. A most-recently-used priority list is used to control which operators are kept in the cache. This is known as live caching because the operators are cached as needed.
Cached operators' nodes are marked with a yellow diamond icon in the FxTree.
If necessary, you can give a particular operator a higher caching priority than other operators by explicitly activating live caching for that operator. This is useful for render-intensive operators and operators with render-intensive parents.
 Except where otherwise noted, this work is licensed under a Creative Commons Attribution-NonCommercial-ShareAlike 3.0 Unported License


