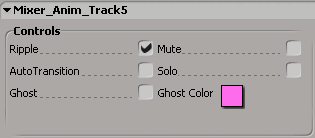
Rippling is a way of having other clips react to the actions you perform on the selected clips, such as moving, removing, adding, scaling, or cycling clips.
Rippling is set per track in the animation mixer, so all tracks with ripple on are affected by any clip being modified on a ripple track. For example, if ripple is on for a track and you move a clip to the right, all clips on all ripple tracks that start after that clip are "pushed" to the right as well, keeping the spacing that was originally between the clips.
If ripple is off, you cannot move a clip past the start of the next one or the end of the previous one.
If you select multiple clips, rippling affects all selected clips on any track that has ripple activated, but not clips on tracks that have ripple off.
If a clip is locked (see Locking Clips), no other clip can move past it.
Click the r button on the track controls at the left of the track. It turns blue when active.

Right-click a track and choose Track Properties, then activate the Ripple option in the Track property editor.

Select the track and choose Track  Track Properties from the mixer command bar and activate the Ripple option in the Track property editor.
The following image shows a sequence of clips before being manipulated with the Ripple option.

Basic clip sequence before manipulating with Ripple on. Note the space between the two groups of clips.
Here are some of the results of actions you can perform on clips with rippling.
When you add a clip, all clips after the added clip's start time ripple to the right the length of the added clip. Notice that the space that was originally between the clips is maintained.

A clip is added between two groups of clips. The space between all clips is maintained.
This example below is the same sequence without using ripple. The clip is trimmed to fit into the space where you loaded it:

A clip is added between two groups of clips. Without Ripple on, the clip is trimmed to fit into the space.
When you remove a clip, all clips after the removed clip's start time ripple to the left the length of the removed clip, taking up the space that the removed clip had previously occupied.
When you move a clip to the right, all clips after the moved clip's original start time ripple to the right the same distance as you move the clip, again maintaining the space that was between the clips.

The clip is moved to the right. The space between the clips to its right is maintained.
When you move a clip to the left, all clips after the moved clip's original start time ripple to the left the same distance as you move the clip. Notice how any clip to the right of the moved clip stays with it, but the space to the left of the moved clip is not maintained.

The clip is moved to the left. The space between the clips to its right is maintained but the gap to its left is closed.
When you scale or cycle a clip to the right, all clips after the scaled or cycled clip's original end time ripple to the right the same length as they would if you scaled or cycled the clip. Again, notice how the inter-clip space is maintained.

The clip is scaled to the right. The space between the clips to its right is maintained.
 Except where otherwise noted, this work is licensed under a Creative Commons Attribution-NonCommercial-ShareAlike 3.0 Unported License