In crowd simulations, you don't usually want all the actors to look the same, but you also don't want to import lots of different actors in order to get that variation. One way to create variation is to keep the same actor, but use modified geometry for some of the actor instances using shape keys. These shapes are not simulated, so they can be applied to the actor's envelope after the simulation has been calculated.
It's best to create the shape keys for the source model before you import it as an actor into a crowd simulation so that the ICE trees are set up for you. You can add more shapes after importing, but it requires a bit more work.
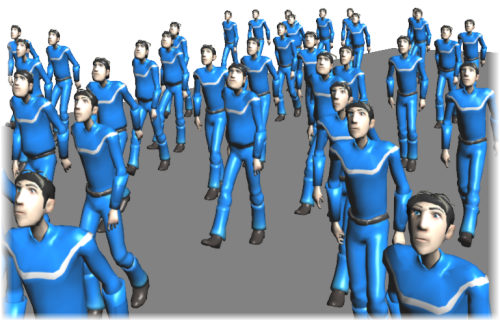
In the image below, each actor has a shape applied with a random weight value, making some of them a bit pudgier or stronger than normal.
Deform the original source model's envelope in some way and store shape keys for one or more states - see Shape Animation.
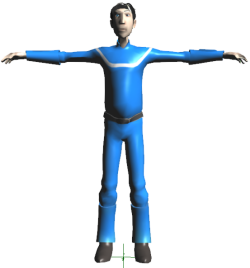
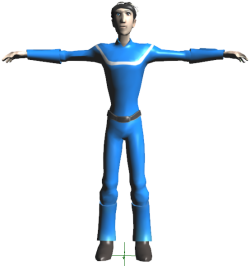
Here, two shapes are defined on the source model: Fat and Strong.
Up to five shapes can be used be default, but you can add more later (see the section below).
Import the model as an actor in the crowd simulation as usual - see Loading Actors for the Crowd Simulation.
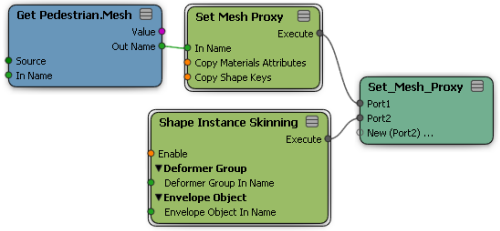
In the Mesh Proxy object's Set Mesh Proxy compound, the Copy Shape Keys option is enabled by default so that the source model's shape keys are automatically copied and available to use on the actors in the crowd who are instantiated from this source model.
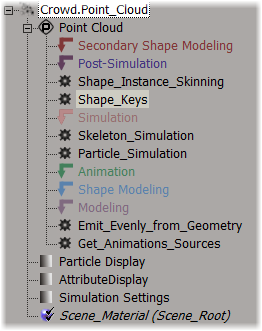
Create a new ICE tree for the simulation point cloud and put it in the Post Simulation region. Give this ICE tree a name, if you like.
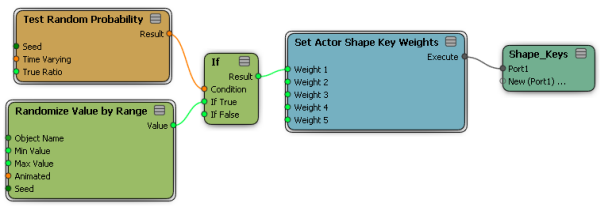
Get a Set Actor Shape Key Weights compound and plug it into this ICETree node.
You could also plug this compound below the Set Locomotion or Set Stadium Animation compound in the Skeleton Simulation ICE tree, but the shapes aren't evaluated until the second frame of the simulation.
In the Set Actor Shape Key Weights compound, set the Weight value that corresponds to each of the shapes you have loaded.
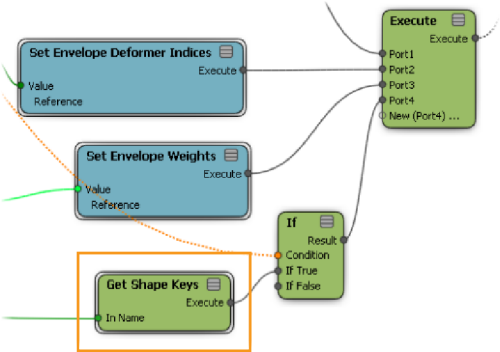
You can see the order in which the shape keys are imported in the Mesh Proxy object's Get Shape Keys compound, as shown in the next section below.
You may want to randomize the Weight value so that each actor instance uses a different weight for the shape.
In this image, a random probability value is set as the condition for which actor instance will use the shape key or not. If the actor instance uses a shape key, its weight is then randomized within a range of set values (0 - 1).
Make sure to turn off the Animated option in the Randomize compound.
If you want to add more shapes to an actor after you have imported it, follow these steps:
Select the original source model's mesh (envelope) and open its Set Mesh Proxy ICE tree.
Create another branch with the three nodes highlighted below for each shape you want to add.
In the Get Data node, specify the name of the shape key to use. Make sure to use the correct syntax for the cluster name, shape key name, and positions attribute (such as cls.Shape.Skinny.positions).
In the Set Shape Key node, update the _CrowdFX_ShapeKey_n value to the next number in the sequence (1 in this case because it's the second shape and the values begin at 0).
If you want to use more than five shape keys, you need to do some work by editing nodes in the ICE tree for the Skeletons Cloud object in the Crowd model (see Anatomy of a Crowd Simulation).
Follow the steps in the Adding Shapes After Importing the Actor section above to add one or more shape keys.
In an explorer, select the Skeletons Cloud object in the Crowd model and open its Create Actor Cloud ICE tree.
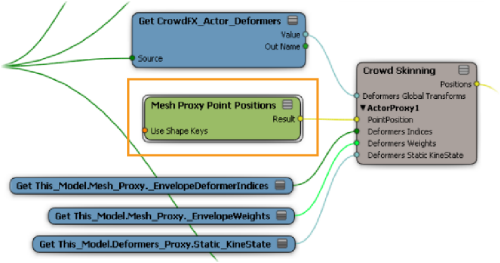
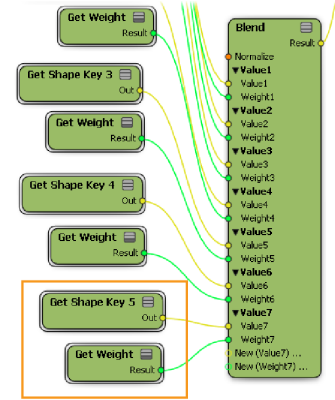
For each shape you have added, create another Get Shape Keyn and Get Weight compound and plug them into the next available Value and Weight ports at the bottom of the Blend compound (see the image below).
Update the values inside both the Get Shape Keyn and Get Weight compounds to the next number in the sequence (5 in this case because it's the sixth shape and the values begin at 0). This value refers to the value in the Set Shape Key node that you set in the Mesh Proxy object.
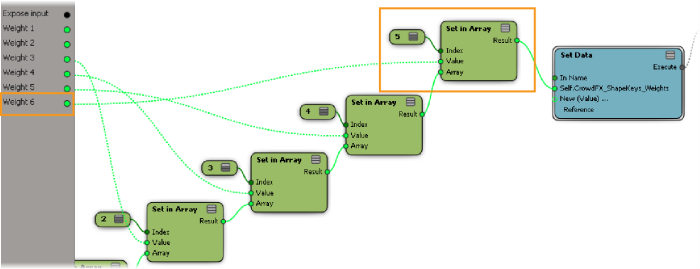
On the simulation point cloud, open the Set Actor Shape Key Weights compound for editing.
For each shape you have added, create another branch of Set in Array + Integer nodes, setting the shape number to the next available value (5 in this case). Plug in the new nodes as shown in the image below.
Expose an new Weightn input port in this compound for each shape key you have added. See Editing Compounds for information on creating ports.
 Except where otherwise noted, this work is licensed under a Creative Commons Attribution-NonCommercial-ShareAlike 3.0 Unported License