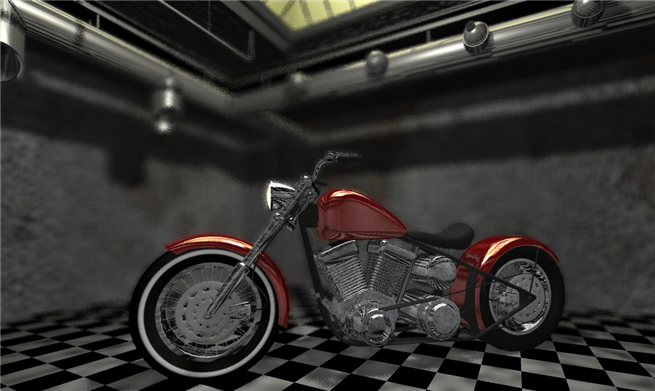
High Quality display mode gives a close approximation of the final rendered image in the viewport, including soft shadows, bump and normal maps, light attenuation, environment, procedural textures, and more.
It works by compiling MetaSL code into CgFX instructions on-the-fly at runtime. It works with all the MetaSL shaders, as well as with many of the standard Softimage shaders for mental ray whose shader definitions have been adapted to support it. If a shader is not supported in High Quality display mode, it is ignored along with any shaders connected into it.
Be aware that there is a limit on the number of instructions that can be compiled and executed. This may limit the complexity of the materials that can be displayed, as well as the number of lights.
Make sure that Enable is checked in the High Quality Viewport Options on the General tab of your Display Preferences, and that Shader Profile is set correctly for your graphics card and driver.
Choose High Quality from the Display Mode menu of a viewport.

Use the options on the High Quality tab of the viewport's Camera Display properties to adjust anti-aliasing, dithering, shadows, screen-space ambient occlusion, and depth of field.
There are several settings that control shadows in High Quality display mode.
You can use the current render pass' environment for the background and reflections in High Quality display mode.
Make sure that the desired pass is current.

If you haven't already done so, add an Environment shader to the pass's shader stack. See Applying Shaders to Passes.
Activate Environment on the view's Show menu (eye icon), or in its Camera Visibility property.

The following are features are supported in High Quality display mode:
The following do not work with High Quality display mode:
The following categories of shaders are not supported:
In addition, only some State Parameter options of the Shading State shaders are supported.
To use High Quality mode with your own shaders, or with shaders for other renderers, their shader definitions must include the appropriate MetaSL blocks.
To see how to do this using SPDL files, you can look at the factory shaders for examples.
If you are not using SPDL files, you can use ShaderDef.AddRendererDef( "MetaSL" ) to add a MetaShaderRendererDef, then set its SymbolName, and finally either set its CodePath to the file path of the shader code or set its CodeText directly to the string of MetaSL commands to execute. For more information, see the SDK Guide.
There are several environment variables that control High Quality display:
When displaying complex materials in High Quality mode on Windows, you may encounter issues related to timeout detection and recovery. This can lead to crashes or freezing. To address this, you can modify the Windows registry as described in Timeout Detection and Recovery of GPUs through WDDM. You can change TdrLevel to 0 to disable the timeouts, or set TdrDelay to a value higher than the default 2. You might need to add the keys if they do not exist already.
 Except where otherwise noted, this work is licensed under a Creative Commons Attribution-NonCommercial-ShareAlike 3.0 Unported License


