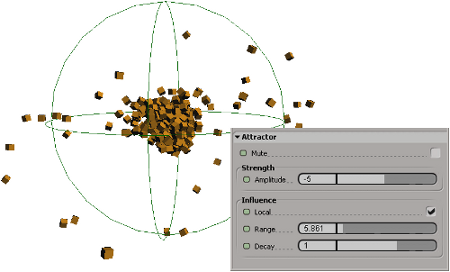
You can create natural forces using the Force commands. You can apply any number of forces to ICE particles, hair objects, cloth objects, soft-body objects, and rigid bodies. As well, you can have the same force applied to a number of hair, cloth, or soft-body objects in a scene.
When you apply a force to a rigid body object, it is applied to the rigid body simulation environment. This makes the force have an effect on all elements in the rigid body simulation, but does not affect other simulation objects in the scene (such as hair) unless you explicitly apply it to them. See Applying Forces to Rigid Bodies for more information.
For information on how to apply forces to ICE particles, see ICE Forces [ICE Guide].
You can apply a force to simulated objects (hair, soft bodies, and cloth) in one of two ways as described below: with the simulation object selected first or with the force created first.
Select the object (hair, cloth, or soft-body object) to which you want to apply the force.
For rigid bodies, you don't need to select anything: just create the force and it is automatically added to the Forces group in the current simulation environment (see Applying Forces to Rigid Bodies).
Choose the force in one of these ways to automatically create and apply the force to the selected object:
The force control object appears in the viewports and its property editor opens. For example, if you selected the Attractor force, the Attractor property editor opens in which you can modify its strength, range of influence, and decay (falloff).

As you modify the force's attributes, its control object in the viewport updates accordingly to provide you with a visual cue as to its strength and/or range. Scaling the control object changes the Amplitude value accordingly.
With nothing selected, choose the force in one of these ways to first create the force object:
Get  Primitive
  Control Object
  force name from any other toolbar.
The force control object appears and its property editor opens.
Select the objects (hair, cloth, or soft body object) to which you want to apply the force.
Do one of the following, according to the type of object that is selected:
Pick the force object, then right-click to end your selection.
You can name each force you create so that it's easy to tell them apart from each other. For example, if you have two different wind forces in a scene, one can be called "gale force" while the other is called "gentle breeze".
You can mute each force so that you can test and tweak the results of forces individually if you have multiple forces in a scene.
You can easily disconnect forces from the simulation objects to which they're associated.
 Except where otherwise noted, this work is licensed under a Creative Commons Attribution-NonCommercial-ShareAlike 3.0 Unported License