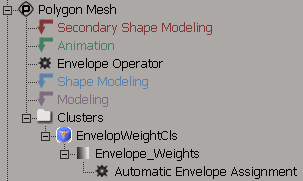
When you define an object as an envelope on a set of deformers, two things happen:
Each point on the envelope is assigned to one or more deformers. This determines which deformers influence that point.
Each point's weight is distributed between its deformers. This determines how much each of the deformers influence that point.
To assign an envelope to deformers
Select the objects, hierarchies, or clusters to become envelopes.
Choose Deform  Envelope
  Set Envelope from the Animate toolbar.
If the current construction mode is not Animation, you are prompted to apply the envelope operator in the animation region of the operator stack anyway. Keeping the envelope operator in the animation region ensures that it is above shape animation as well as any topology operators, giving best results in most cases. It also prevents the envelope operator from being removed if you freeze the modeling or create shape clips.
It is recommended to apply the envelope in the animation region unless you will be using the envelope deformation as a modeling tool.
For more information about construction modes in general, see Construction Modes and Regions [Modeling and Deformation Basics].
Pick the objects that will act as deformers. You are not restricted to skeleton bones; you can pick any object. Left-click to pick individual objects and middle-click to pick branches.
You can also pick groups in the explorer — this is equivalent to picking every object in the group individually.
If you make a mistake, Ctrl+click to undo the last pick. If you change your mind, press Esc to cancel the entire operation.
You can create a group for your deformers first, then simply pick the group when setting an envelope.
However, if you later add an object to the group, it is not automatically included as a deformer in the envelope assignment. To add deformers after enveloping, see Adding Deformers.
When you have finished picking deformers, right-click to terminate the picking session. The Automatic Envelope Assignment property editor opens.
Each deformer is assigned a color, and points that are weighted 50% or more toward a particular deformer are displayed in the same color.
To see the deformer colors on points in a viewport, click the eye icon in its menu bar and make sure that Weight Points is on.

To change the deformer colors, see Modifying Display Colors.
Set the Number of Skeleton Objects to which each point on the envelope is assigned initially.
For example, if you leave this parameter at the default of 2, each point is controlled by the two nearest deformers and its weight is divided between them.
Distance-based assigns weights based on the distance between points and deformers.
Normal-based considers the directions of the surface normals in addition to distance.
This option is useful, for example, when enveloping things like legs and fingers. This method never assigns points from adjacent appendages to a deformer. The restriction is that the deformers must be entirely inside the envelope.
Move the deformers to see how the envelope deforms.
If necessary, you can now change the deformers to which points are assigned, as well as modify the envelope weights using the methods described in the next few sections.
At any time, you can redisplay the Automatic Envelope Assignment property editor and change the options you initially chose (Number of Skeleton Objects, Assignment Method).
To do this, select the envelope and choose Edit Properties Animation Properties or Edit  Properties
  Modeling Properties and click the Automatic Envelope Assignment tab.

Returning to the Reference Pose
The Reset Actor command returns the envelope and its deformers to their reference poses.
If the envelope deformers are constrained to other control objects, then Reset Actor won't work. In such cases, you should use the Actions  Store
Store  Transformations - Current Values command to store an action containing the current transformations of all your deformers and control objects in the reference
pose before you move anything, and Actions
  Apply
Apply  Action to return to the reference pose.
For more information about actions in general, see Actions [Nonlinear Animation in the Animation Mixer].