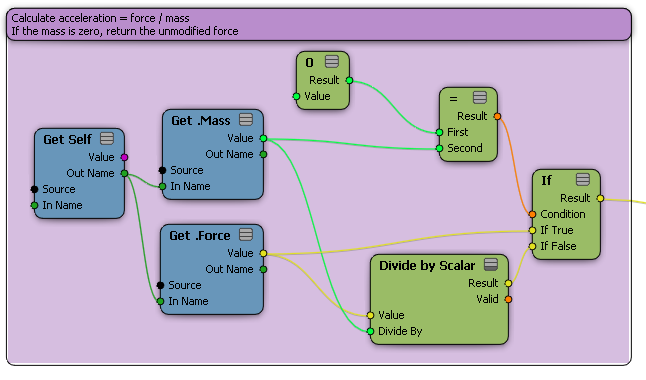
You can add comments to document your trees. Like comments in programming code, they help to explain your trees to people
who might be trying to use or modify them, including yourself!
Commenting a Single Node
Nodes with comments display a speech bubble in their title bars. Click the speech bubble to display or hide the comment.
To add a comment to a single node
-
Right-click on a node (not over a port) and choose . The Comment property editor opens.
-
Enter the comment text and set its color as desired.
-
Click to apply your changes and keep the Comment property editor open.
Changes are automatically applied when you close the property editor.
To modify a comment for a single node
-
If necessary, display the comment by clicking on the speech bubble.
-
Double-click on the comment text. The Comment property editor opens.
-
Make any changes you want and click Apply or close the property editor.
To offset a comment for a single node
By default, comments are displayed along the top of the node. You can move them by clicking and dragging. Comments remain
attached to their nodes by a thin line.
To remove a comment from a single node
Adding Comment Nodes
As an alternative to attaching a comment to a specific node, you can use a Comment node to place a comment anywhere in a tree.
To edit a comment
-
Double-click on the Comment node. The Comment property editor opens.
-
Enter the comment text and set its color as desired.
-
Click to apply your changes and keep the Comment property editor open.
Changes are automatically applied when you close the property editor.
To resize a comment
-
Make sure that Auto Resize is off in the Comment's property editor.
-
Move the mouse pointer over the Comment's border.
-
When the pointer changes to a double-headed arrow, click and drag to define a new size.
To minimize and restore a comment
-
To minimize a comment, move the mouse pointer over a comment and click the Minimize icon that appears.
-
To restore a minimized comment, double-click on it.
Commenting Groups of Nodes
You can document multiple nodes in a section of a tree using a Group Comment node. Group Comments have a couple of advantages:
-
You can middle-click on its label to select and move the Group Comment node and all other nodes that overlap it.
-
The background color is displayed in the Bird's Eye View, so you can quickly find specific areas of your tree.
NoteGroup comments are just regions in the workspace. Selecting or branch-selecting the nodes inside a group comment does not
select the group comment itself. Middle-click on the group comment's label to select it and its contents, or use Shift to
add the group comment to the selection.
To add a Group Comment node
To edit a Group Comment node
-
Double-click on the Group Comment's label. The Comment property editor opens.
-
Enter the comment text and set its color as desired. To make the color show more clearly in the Bird's Eye View, increase
the Background Color's Alpha value.
-
Click to apply your changes and keep the Comment property editor open.
Changes are automatically applied when you close the property editor.
To resize a Group Comment node
-
Move the mouse pointer over the bottom or sides of the Group Comment. When the pointer changes to a double-headed arrow, click
and drag to define a new size.
-
To move the top of the Group Comment, first click the label and drag it to a new location and then adjust the sides and bottom.


