Using different Timer compounds, you can set up particle events to happen when a certain time limit has been reached. You set a condition that will start a timer. The timer runs its course according to the time you've specified. Then when the time is up, the particle event happens and the particles change state.
You can set up particle timers either with or without using a state system. Both methods are described here.
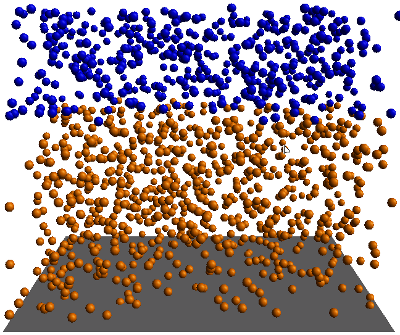
In the image below, a simple change of particle states happens with a timer. The particle's position in Y triggers the timer to start, then when the time is up, the particles change color.
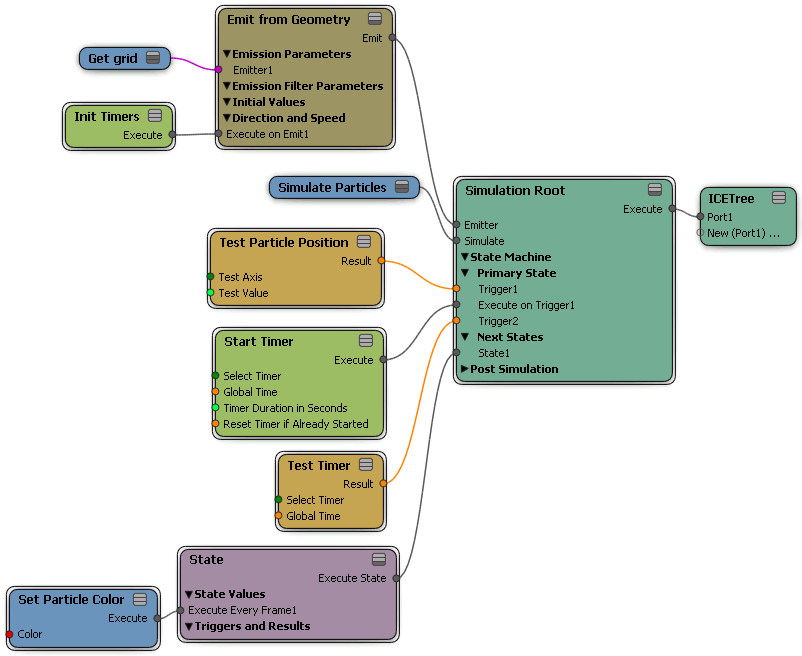
Using Particle Timers in a State System
You can create this effect using the state system.
Create a particle emission — see Creating a Basic Particle Emission for information.
Get the Init Timers compound and plug it into the Execute on Emit port on the Emit compound. This initializes the timer attributes in the ICE tree and is necessary for using timers.
Choose one of the Particles  After Emission State Machine Test commands from the ICE toolbar, or get any Test compound from the Conditionals group to act as the trigger for the timer to
start.
After Emission State Machine Test commands from the ICE toolbar, or get any Test compound from the Conditionals group to act as the trigger for the timer to
start.
Plug this compound into the Trigger port of the Primary State (first state you want to use) on the Simulation Root node.
In the Test compound's property editor, set the condition that you want to test for.
In this example, when the particles reach a position value in Y (6), the Start Timer begins counting.
In the Start Timer property editor, give this timer a name and set the amount of time (in seconds) that you want the particles to stay in this state.
Get the Test Timer compound and plug it into the Trigger2 port of the Primary State.
The Test Timer compound acts as a trigger for activating the second state of the particles: when the time defined in the Start Timer compound is finished, that trigger is pulled.
In the Test Timer compound property editor, make sure that the timer name you defined in the Start Timer compound is selected.
Choose Particles After Emission State Machine Add State from the ICE toolbar to add a State compound to the ICE tree (or simply get a State compound and plug it into a State port
on the Simulation Root node as shown below).
Drag some compound or node that makes the particles change when the timer value is reached, such as a Set compound. Plug it into the Execute Every Frame port of the State node.
In our example, this is the Set Particle Color compound: the particle color changes when the Start Timer value is reached and the Test Timer pulls the trigger.
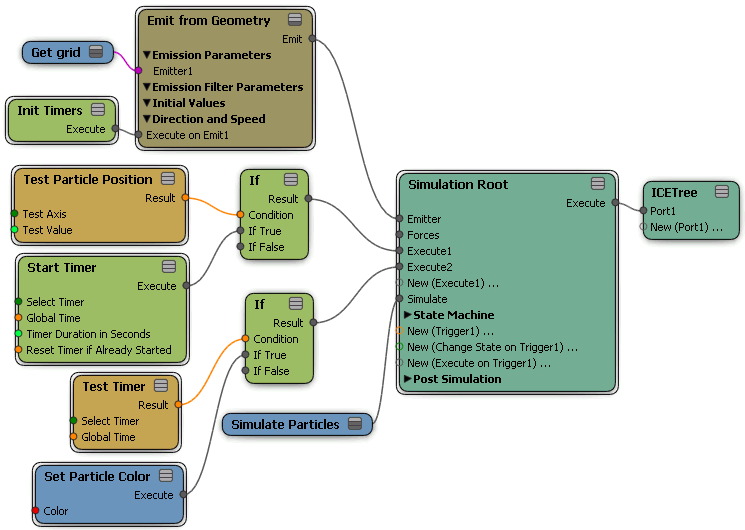
Using Particle Timers with If Nodes
Create a particle simulation — see Setting Up Any Type of ICE Particle Emission.
From the preset manager, get two If nodes and plug them into consecutive Execute ports on the Simulation Root node (or in ports on the ICETree node if you're not using the Simulation Root node).
Note that you can use nodes or compounds other than the If node: the criteria is that the node needs to cause an execution.
Get the Init Timers compound and plug it into the Execute on Emit port on the Emit compound. This initializes the timer attributes in the ICE tree and is necessary for using timers.
In the Test compound's property editor, set the condition that you want to test for.
In this example, the Test Particle Position is used so that when the particles reach a certain position value in Y, the Start Timer begins counting.
In the Start Timer property editor, give this timer a name and set the amount of time (in seconds) that you want the particles to stay in this state.
Get the Test Timer compound and plug it into the Condition port of the second If node.
This acts as a trigger for activating the second state of the particles: when the time defined in the Start Timer compound is finished, that trigger is pulled.
Drag some compound or node that makes the particles change when the timer value is reached, such as a Set compound. Plug it into the If True port of the second If node.
In our example, this is the Set Particle Color compound: the particle color changes when the Start Timer value is reached and the Test Timer pulls the trigger.