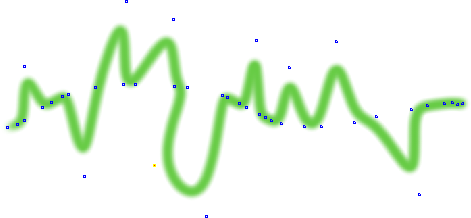
The paint brush is the most basic tool for painting brush strokes. You use it to paint on images as if you were using a real paint brush, or one of the myriad tools simulated by the brush presets in the Fx paint brush list. Painting is a simple matter of clicking and dragging on a paint operator's image.
Each time you apply paint to an image using the paint brush, you create a stroke. The default Color brush preset applies fairly wide, soft, and even strokes using the foreground color. However, you can edit any brush preset's brush properties to create exactly the kind of stroke you want.
Edit the paint operator that you want to paint on, as described in Editing and Previewing Paint Operators.
Choose a brush from the Fx Brush Selector and edit its properties as described in Setting Paint Brush Properties.
Choose a color as described in Choosing Colors with the Fx Color Selector.
When using the Paint Brush tool, you can also choose a color by positioning the paint cursor over any part of the image in the Fx viewer, holding down Alt, and clicking once. This matches the foreground color to the pixel color at the click point.
If you are using a brush that uses a brush offset (see Setting the Brush Offset), do the same thing but hold down Shift+Alt.
From the paint menu in the Fx viewer, choose Draw  Paint Brush Tool.
Alternatively, you can position the mouse pointer over the Fx Viewer and press B.
Drag the brush cursor over the image in the Fx Viewer.
Paint strokes are applied to the currently displayed frame in the Fx Viewer, using the specified foreground color.
Using the Paint Brush, in Vector Paint Operators
In vector paint operators, the paint brush tool works exactly the same way as it does in raster paint layers, only non-destructively. Paint brush strokes are added to vector paint operators as stroke shapes, which behave somewhat differently from color shapes, and are not editable to the same extent.
Keep the following in mind when using the paint brush tool in a vector paint operator:
Although they are Bézier-curve based, stroke shapes' points do not have editable handles. Once you've painted a stroke, you can edit its points to change its shape, but you cannot control the way the line curves at a given point.

Stroke shapes have editable points, but they are much smaller and usually more numerous than color shapes' points.

You can drag stroke shape points to change the stroke's shape, but you cannot control the curve of the stroke at any given point.
You cannot change a stroke shape's type (to B-Spline or Polyline, for example.
If you want to draw a line that you can manipulate like a real Bézier shape, use the Freehand tool or the Mark Out Shape tool to draw an open shape and make sure it has no fill (see Setting the Shape Type).
Alternatively, you can use the line tool, which creates a stroke-only color shape that you can add points to and edit (see Using the Line Tool in Vector Paint Operators).
When you first paint a brush stroke, a new stroke shape object is created. Subsequent strokes are added to the same object until you change the paint settings (by choosing a new color or brush, modifying the stencil and so on). This prevents situations where you might inadvertently create hundreds of stroke shape objects by painting several small strokes.
For transformation purposes, all of the strokes in a stroke shape object are treated as a single object, as shown in the following example:
Editing Stroke Shape Properties
Once you've painted a stroke in a vector paint operator, it becomes an editable shape whose properties you can edit.
To edit a stroke shape's properties
Edit the paint operator whose stroke shape you wish to edit, as described in Editing and Previewing Paint Operators.
Select a stroke shape, as described Transforming Shapes, and press Enter to open its property editor.
On the Shape tab, you can set the shape's Color and Opacity.
If desired, you can also you can transform the stroke shape, edit its points, and animate it as you would any other shape. See the following sections for more information: