Selecting and moving points, polygons, edges and clusters is just as easy as moving objects in a 3D view. Once a selection is made, as described in the previous section, click the Scale, Rotate, or Translate (s, r, t) button in the command bar of the texture editor. Then use the mouse to manipulate the selection. Use the left mouse button to transform freely, and the middle and right mouse buttons to transform in U or V only as indicated by the prompts at the bottom of the Softimage window.

|

|

|
Maintaining the Aspect Ratio During Rotation
When you're working with non-square texture images, selections of UV coordinates can become distorted when you rotate them. Holding down the Alt key while rotating your selection preserves its aspect ratio and prevents distortion.
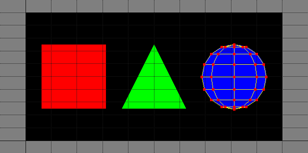
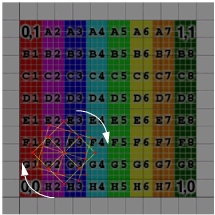
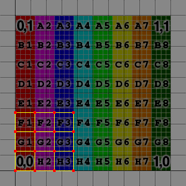
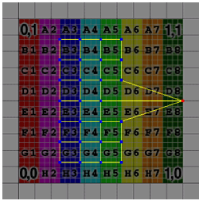
A planar projection has been applied to a sphere, and the resulting UV coordinates have been scaled to fit the blue circle on the texture image.
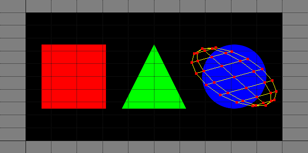
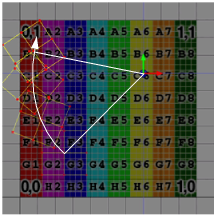
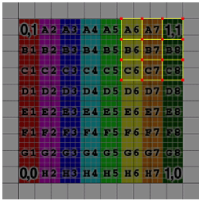
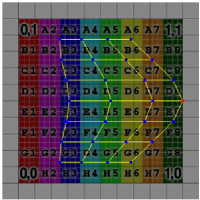
Rotating the UV coordinates by about 45 degrees distorts their aspect ratio.
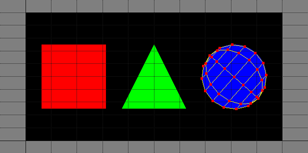
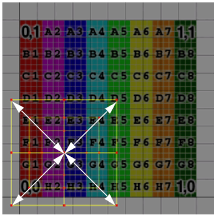
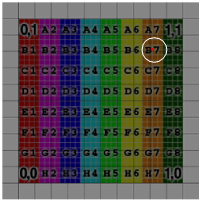
Holding down Alt and rotating the UV coordinates preserves their aspect ratio, keeping the sphere's coordinates on the circle.
Setting the Pivot for Scaling and Rotation
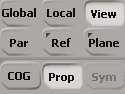
By default, a selection of sample points is scaled and rotated relative to its center of gravity (COG). However, you can scale or rotate a selection relative to any point in the texture editor work area by setting and activating the pivot.
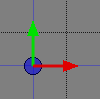
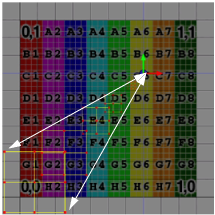
The pivot is represented by the pivot icon, a 2D version of the XYZ icon that appears in the 3D views. The first time that you activate the pivot, it appears in its default location, which is the lower-left corner of the texture image.
Click the Set Pivot button in the texture editor command bar. The pivot icon appears.

Click and/or drag anywhere in the texture editor work area to position the pivot icon.
To help you position the pivot point more precisely, you can enable snapping. For more information about the different texture editor snapping options, see Snapping Tools.
Use the " . " (period) key in Supra or Sticky mode to quickly toggle the Set Pivot tool on and off.
Rather than selecting with one tool and moving your selection with another, you can use the Move Component tool move points, polygons, and edges with a single operation.
Click the Move Component button in the command bar or press M to activate the tool. Then click and drag a component to the desired location.

When you need to move a selection of sample points to a precise location, you can use the U/V position boxes in the texture editor command bar to enter specific U and V coordinates for the selection. The selection is repositioned in one of two ways, depending on whether the Split Components option (Set button) is activated or not:


If the Split components option is activated, each point in the selection is translated to the specified UV coordinates.
If the Split Components option is not activated, the selection's center of geometry (COG) is translated to the specified UV coordinates.
Using the U/V position boxes is one of the easiest ways to "straighten" lines of points. Select the points, make sure that the Split Components function is activated, and enter a U or V position. The line is straightened along the appropriate axis.
The U/V position boxes behave like any other edit boxes in that:
Rather than move individual selections, you can define a surrounding area of influence that moves with the initial selection. For example, if you activate Proportional mode and move a single point on the chin of a face model, the rest of the face moves as well, in relation to the initial move.
Snapping lets you align points, polygons, or clusters when moving them in the texture editor. You can enable different snap targets and adjust the overall snapping "sensitivity."
In the texture editor, snapping works on a closest-point basis, meaning that when you transform a selection of multiple sample points, the point closest to the mouse-down position is snapped to the target.

The point in the snapping icon's "crosshairs" will be snapped to the target.
Snapping works with multiple UV coordinate sets, meaning that if more than one set is displayed in the texture editor, you can snap selections of the one UV set's coordinates to another. For more information about working with multiple sets of UV coordinates, see Editing Multiple UV Sets.
You can define the target(s) to which your selection can snap. These targets are toggled on and off from the Snap menu in the Texture editor's command bar.
Midpoints include the midpoint of polygons and polygonal edges.
Pixel Corners is the corner of a pixel where it meets three other pixels.
Pixel Edges is the edge of a pixel where it meets another and changes value. This setting is useful for applying a very precise color to a specific point or group of points.
Using the texture editor, you can select any number of points and collapse them along the horizontal and vertical axes or onto a single coordinate. This is useful if you wish to assign particular pixel values to several points.
Collapse Horizontally moves the selected points to a single position on the horizontal axis while retaining their position on the vertical axis.
Collapse Vertically moves the selected points to a single position on the vertical axis while retaining their position on the horizontal axis.
Collapse moves all points in the selection to a single coordinate in the center of the selection.


 Snap Gravity