Although the shape manager makes it easy to shape-animate a complete object (one cluster for the whole object), you can also work with shapes on multiple clusters on an object. Any of the object's clusters with shapes on them are displayed in the shape list.
As you're working with the clusters, you can easily view and select clusters, as well as specific points in clusters.
Choose Edit  Cluster Select points of current cluster in the shape manager's menu bar to select only the points in the cluster that are affected by the selected shape.
When you have multiple clusters on an object, this option makes it easy to always select the correct points for making shapes on the same cluster.
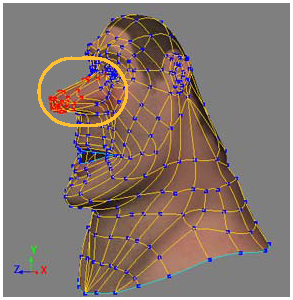
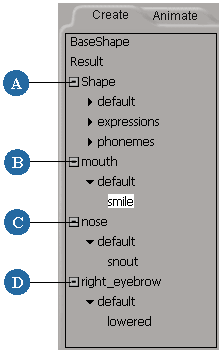
The Snout shape is selected in the shape list. The points in the cluster that are used for making that shape are tagged (selected) and displayed in red.
Making New Clusters Including Tagged Points
Choose Edit Cluster New from selected points in the shape manager's menu bar to create a new shape and cluster that includes any selected points. The cluster that
is created is named Point and the shape is named ShapeKey.
Creating a new cluster and shape is useful for when you're making minor adjustments to the shape on a cluster, but need to select a few points around it to get the correct shape. For example, you have a mouth cluster with shapes on it, but you need to select a few points around it and make a new shape to get just the right expression.
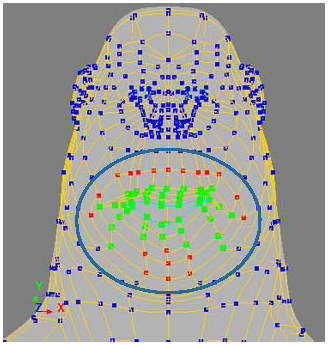
The Smile shape is selected in the shape list. The points in the mouth cluster used for this shape are displayed in green, while the selected (tagged) points are in red.
When you choose the New from selected points command, a new cluster that includes all these points is created, as well as a shape for this new cluster.
Displaying Clusters and Points
To display affected points or clusters on the object
Choose View Affected Points from the shape manager's menu bar. This displays the points (in green) that are affected by the selected shape.
This option is available only for shape keys that are set in the Object Relative or Local Relative reference mode (see Deformations and Shape Reference Modes).
Choose View Current Cluster Points from the shape manager's menu bar. This displays the cluster points (in light gray) that are affected by the selected shape.
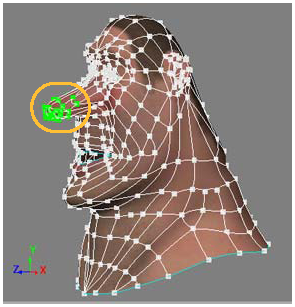
The Nose shape is selected in the shape list:


