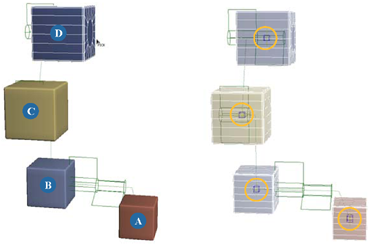
If you want to constrain multiple rigid bodies in a chain-like fashion, you use the Multi Constraint Tool command. After you choose a constraint command, a picking session begins in which you need to pick the constrained and constraining objects.
In this example, you will constrain object A to B, B to C, and C to D. Object D (the cube) is a passive rigid body, which acts as an anchor for the other active rigid bodies.
To chain-link rigid bodies with constraints
Choose a constraint from the Create  Rigid Body
  Multi Constraint Tool menu in the Simulate toolbar: Hinge, Ball and Socket, Spring, Slider, or Fixed.
The Hinge or Ball and Socket constraints are usually the most useful.
Middle-click the rest of the objects in the order you want them to be connected together (B, C, D).

Hinge constraints with multiple rigid bodies in a chain. Objects A, B, and C are active and object D is passive. Notice how each constraint object is attached to each constrained objects' centers.
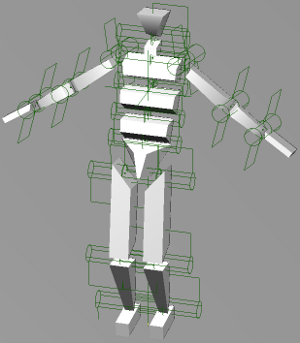
While you cannot apply rigid body to chains (skeletons), you can build a skeletal structure ("rag doll") by linking several rigid bodies together as limbs with hinge or ball-and-socket constraints.
Then constrain your chain skeleton to this rag doll rig. Once you have the effect you want, plot the motion on the rag doll rig, and then transfer that motion to the chain skeleton.
