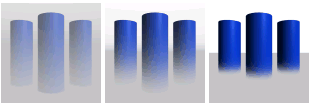
The Mist shader can create a true layered fog along with a realistic depth fading effect. In addition, it allows for increased control by providing the ability to specify directional variation with a texture map.
For an interesting application, use the Mist shader on container objects: applying Mist as a volume shader of a transparent object gives the object a murky interior without adversely effecting rendering times.
If banding occurs when using Mist, turn on the Dither option in the mental ray Render Options to correct it (see Sample Filtering for information).
| Name |
The name of the shader node displayed in the render tree. Enter any name you like, or leave the default. |
| Transparency |
Controls the fog's maximum transparency. The fog will never become more opaque than this value. Low values give a more opaque fog, while higher values give a more transparent fog. |
| Affect Alpha |
Controls whether or not the Mist shader is applied to the alpha channel. With this option off, Mist does not alter the alpha channel value. |
| Use Solid Color |
There are two ways of setting the fog's color: Solid Color or Bitmap. This option toggles the activation of the Solid Color parameter. |
| Solid Color |
Select one Solid Color that is applied in all directions. |
| Use Map |
This option toggles the activation of the Bitmap parameter. |
| Bitmap |
Displays the image to be used. This changes the color depending on viewing direction, much like a reflection map. This is useful in situations such as a sunset, where the fog color is different whether you are looking toward or away from the sun. You can Edit the image clip, or get a New image clip from file or from source. For more information about working with images, see Managing Image Sources & Clips [Data Management]. |
| Layering |
To get the appearance of fog laying on a surface, Layering changes the fog's thickness as a function of height. 
|
| Base Plane Normal/Distance |
These two parameters control the layer's vertical direction (Base Plane Normal) and position (Base Plane Distance) from the global center. |
| Transition Height |
Controls the height of the transitional layer, and thus how abruptly the fog varies from opaque to transparent. |
| Linear Falloff |
Controls the rate at which the fog becomes opaque over distance. Linear Falloff activates linear decay. |
| Linear Start/Linear End |
At the Linear Start distance, the fog is transparent; at the Linear End distance, the fog is opaque. Distances between these two interpolate linearly. |
| Realistic Falloff |
Controls the rate at which the fog becomes opaque over distance. Realistic Falloff uses an exponential function, similar to a natural fog. While the Linear falloff has an abrupt end (as an object passes through the End distance, it seems to "pop" into view), the Realistic falloff is more gradual. With Realistic Falloff, you have no direct control over starting and ending distances, only the Density. |
| Density |
Controls the fog's overall thickness. |
| Custom Falloff |
Controls the rate at which the fog becomes opaque over distance. This option allows you to specify your own falloff curve. See Creating Custom Curves below for information. |
| Custom Start/Middle/End |
At the Custom Start distance, the fog is transparent, and at the Custom End distance the fog is opaque. At the Custom Middle distance, the fog is exactly halfway between transparent and opaque. Distances between each of these values are interpolated on a spline curve. |
You can create custom curves for this shader.
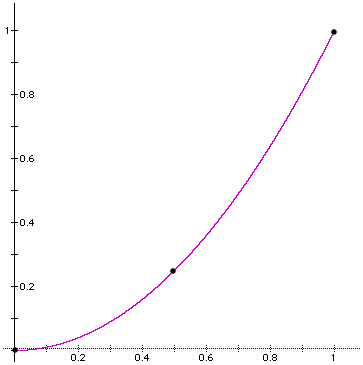
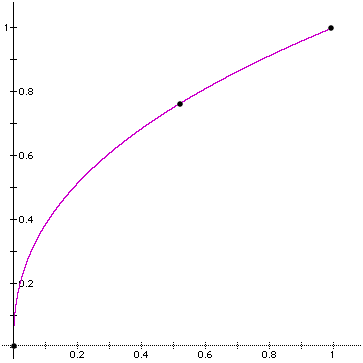
The shader asks for three values: a starting value, a middle value, and an ending value. From these, the shader approximates a curve that passes through the three points.

The curve above is for start = 0.0, middle = 0.25, end = 1.0

The curve above is for start = 0.0, middle = 0.50, end = 1.0

The curve above is for start = 0.0, middle = 0.75, end = 1.0