Many parameters in the Hair property editor can have weight and texture maps connected to them. These parameters are identified with a little connection icon beside them.

Weight maps let you paint parameter values across the surface of an object. For example, you can use weight maps to vary the length or density of render hairs.
For an example on how to connect a weight map to a hair parameter, see Changing the Length of Render Hairs.
A texture map is the combination of a texture projection plus an image. Instead of one value being applied over the surface as with a weight map, a texture map applies a color. You create a texture map in which you select the texture projection method, then link up an image file whose pattern of colors you want to map.
For an example on how to connect a texture map to a hair parameter, see Connecting a Texture Map to Hair Color Parameters.
For general information about mappable parameters, see Parameter Maps [Scene Elements].
To connect a map to a parameter for hair
Unlike other geometry in Softimage, hair is not a typical surface so you can't apply maps directly to it. Instead, you need to first create a weight or texture map property for the hair emitter object, and then transfer it to the hair object itself.
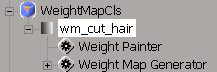
Create a weight map or texture map for the hair emitter object.
Open an explorer so that you can pick the weight or texture map from it.
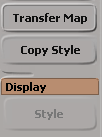
Select both the hair and emitter objects and click the Transfer Map button on the Hair toolbar. This transfers the map from the emitter object to the hair object and prompts you to pick the map.
In the explorer, pick the map that you created for the emitter object.
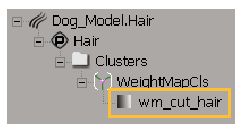
Under the hair object's Cluster folder, you'll see a new map that matches the one you transferred from the emitter object.
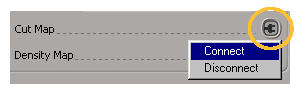
In the Hair property editor, right-click a parameter's connection icon and choose Connect.
In the pop-up explorer, pick the map that you transferred to the hair object from the emitter object (wm_cut_hair in this example).
The connection icon shows that a map is connected (turns red). You can click on this icon to open the weight or texture map's property editor.
After you connect the map, you can go back and adjust the weight or texture map on the emitter object's original map, and see that the connected map (and the results on the hair) is updated.


