Deformation by spine lets you change an object's shape using curves as deformers, similar to the way that you can deform envelopes by moving bones in a chain. Each curve defines a cylinder of influence with an associated radius and object points within a curve's influence are assigned to that curve. If an object point is close to two or more curves, it is weighted between them.
Spine Deformations and Construction Modes
Spine deformations use a "rest" shape of the spine curve to determine how to modify the deformed object. Any deformations you apply to the spine on top of this rest shape affect the deformed object as well.
When you apply a spine deformation, the rest shape is defined by the current top of the modeling construction region in the spine curve's geometry operator stack. The spine-deformed object is affected by any new deformations above this point in the modeling region, as well as in the other regions. If the spine curve already has deformations above the modeling region, the shape of the spine-deformed object changes as soon as you apply the spine deformation.
The rest shape can be affected by modifications you make to the spine curve. If you freeze all or part of the spine curve's modeling region and "bake" the position in the stack where the deformation reads the rest shape, then the bottom of the stack becomes the rest shape.
When you set the Construction Mode Display of 3D views to Sync with current mode, you may or may not see the effect of the spine deformation depending on which region of the spine-deformed object contains the Deform by Spine Operator. However, if the effect is visible, then the deformed object is always affected by all operators on the spine curve no matter what region they are in.
For more information about construction modes in general, see Construction Modes and Regions.
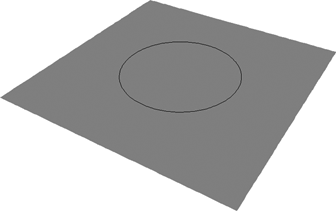
Create the curves for deforming the object. The curves should be as close to the object's surface as possible; otherwise, points on the object's surface may fall outside the curve's radius of influence.
Also, note that the closer the curves' points are to the object's points, the more closely the deformation of the object's surface will follow the curves' points as you move them.
Choose Deform  By Spine. This command is available under Modify on the Model toolbar as well as under Deform on the Animate toolbar.
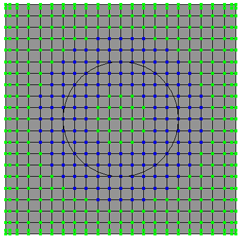
When you have finished picking curves, right-click in a geometry view. Clusters are created and colored according to the deformer and the Deform by Spine Property Editor appears.
Amplitude Falloff Profile controls the modulation of the deformation along the radius of influence from the curve to the edge of the effect.
Radius controls the base width of the cylinder of influence in SOFTIMAGE units.
Longitudinal Radius Profile controls the actual width of the cylinder of influence as a fraction of the base Radius along the percentage length of the curve.
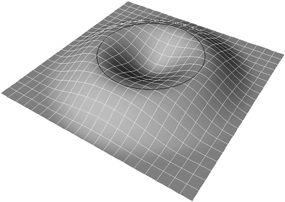
Select a curve deformer and use it to change the shape of the object. Any change you make to a curve deformer is reflected in the shape of the object. For example, you can:
Move points, either using the Move Point tool or by selecting points and transforming them with the SRT tools.
You can also add points to the curve for finer control. For more information, see Modifying Curves [Surface and Curve Modeling].
Apply deformations like Twist and Bend to the curve.
Spine deformations use the same mechanism as envelopes for weighting points to deformers. You can modify the weights of points in a spine deformation either manually or by painting.
Each point on an envelope has a total weight of 100%, which is divided between the deformers to which it is assigned. For example, if a point is weighted by 75% to deformer A and 25% to deformer B, then A pulls three times as strongly as B on the point.
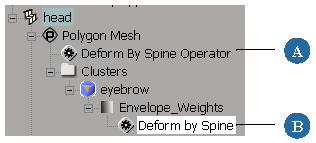
The Deform by Spine node is available under the Envelope_Weights property of the corresponding cluster. It allows you to modify the initial point weighting to the spine deformers.
You can modify the way points are weighted to the curves in exactly the same way as for envelopes: by painting or by editing numerically.
When you modify the weighting, your changes are added to the Envelope_Weights operator stack, similar to the geometry operator stack. Once you are satisfied with the deformation, you can freeze the weights to improve performance. After you have frozen the weights, you can still make modifications, but Softimage cannot recalculate the initial assignment.
For a complete description, see Modifying Envelope Weights [Character Animation].


