To play audio when you play back the scene or scrub the timeline, you must first enable audio in the preferences property editor. You should also set the frame rate for playback.
When you play audio in Softimage, it links to the file you're using for sound, but it does not load the entire file in RAM. This allows you to use very long streams, such as a QuickTime movie, because the length of the file is not important. However, Softimage needs to be able to load the sound chunks fast enough from the file, so the files need to be on a fast disk. If the files are compressed in complicated ways, if they are unnecessarily stereo or high-bit depth, or if they have more than one track, Softimage cannot get the audio samples fast enough and some stuttering may occur.
When you load an audio source into the mixer and create an audio clip, the audio is enabled by default. There are different ways to enable or mute the audio, depending on how you're working.
To enable/mute audio for playback
You can enable or mute the audio in general by clicking the Play/Mute Audio button on the Playback panel. Audio is muted when the button appears highlighted.
You can enable or mute a specific audio track in the mixer by clicking its Mute icon. This mutes all audio clips that are on the track.

You can enable or mute the audio only while scrubbing in the timeline — see Scrubbing the Audio.
The frame rate determines how smoothly the audio plays back. You will probably want to play back the audio in real time (RT) for better sound. As well, you can set the realtime playback rate to whatever percentage you like.
For information on setting the playback rate, see Playing Back All Frames or Playing in Real Time.
Scrubbing means to drag the playback cursor back and forth in timeline. This is something that you need to do frequently as you check the sound in a clip. There are different modes that you can set for scrubbing, as well as the scrubbing playback rate.
To set options for audio scrubbing
Choose File  Preferences from the main menu to open the Interaction Preferences property editor and click the Playback and Audio tab.
Set the options in the Scrubbing area, as described in Scrubbing [Preference Reference].
Make sure to select the Play Audio When Scrubbing option to be able to play the audio only when scrubbing in the timeline.
Drag the playback cursor in the timeline to scrub the audio using these settings.
Synchronizing the Audio with the Animation While Scrubbing
There are two options in particular in the Interactions Preferences property editor that help you to better synchronize your audio with the animation while you're scrubbing: Play Frame Entered When Scrubbing and Play Audio at Display Refresh When Scrubbing.
See Scrubbing [Preference Reference] for information on when you might want to use these options.
Looping the audio lets you play a portion of the audio repeatedly. There are different ways in which you can loop the audio, depending on how you're working: you can use the Quick Loop mode, set up loop markers in the timeline as you would for any animation, or loop an audio clip in the mixer.
For more information on Quick Loop and loop markers, see Looping the Playback [Viewing and Playback].
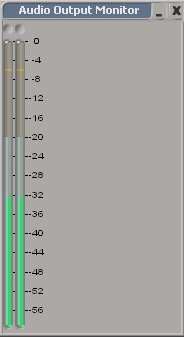
You can monitor the output of the audio, in decibels, using a special audio monitor. This lets you see any peaks (displayed in orange) in the audio source.
This monitor is convenient to use because it doesn't take up much space on the screen, and you don't need to have the animation mixer open to see the audio waveforms.
To open the audio output monitor
Choose View  General
  Audio Output Monitor from the main menu.
You can also drag the audio clip from the mixer or explorer into the animation editor to see the peaks there (see the next section, Viewing Audio Waveforms).
