Show in Contents

Add to Favorites

Home: Autodesk Showcase Help

Create additional arrangements in the Organizer

The Organizer

Add lighting and the environment

Combine and separate objects to improve frame
rate
This feature is available
only for Autodesk Showcase Professional.
Large production models, which
typically have hundreds of parts that are comprised of thousands
of surfaces and surface patches, can significantly slow Hardware
rendering performance (the frame rate) while interactively authoring
or presenting a scene.
You can improve the interaction
performance (even with multiple production models loaded and displayed
side by side) by combining objects in the Organizer. Combining objects
essentially flattens the selected object hierarchy to speed the
frame rate. However, to prevent data loss (for example, material
assignments), you must follow the workflow guidelines and possibly
modify your workflow.
To learn more about the
frame rate and its relationship to display quality, see
The Organizer for
frame rate or quality.
NoteHierarchies
or groups containing lights cannot be combined. The combine option
will be grayed out and unavailable when these items are selected.
Deselect or remove the lights from the group and then combine.
Combine and separate working
guidelines and limitations
Follow these working
guidelines to combine nodes successfully without losing important
data:
- Resist
combining objects that go into different alternatives or behaviors.
If you do combine the objects, the assignments may break, and you
may need to redo the reassignments.
- Precalculated ambient shadows may be
adversely affected when you combine mixed geometry (e.g. polys and
NURBS). Before combining, occlusion is applied differently to different
data types (for NURBS, through textures; for polys, through vertex
colors); after combining, NURBS and polys textures are ignored,
and all occlusion is vertex based.
- Combining a shadow caster will result
in the entire combined node being a shadow caster for that light.
- Combining objects that may appear to
have the same texture may cause the texture placement to shift or
scale in unexpected ways. In this case, re-place the texture on
the combined object.
- You cannot combine a node that has already
combined objects within it; the combine button and menu item is
not available in this case. An alternative approach is to separate
the combined node, then combine at a higher level of the hierarchy.
Combine objects
To combine objects:
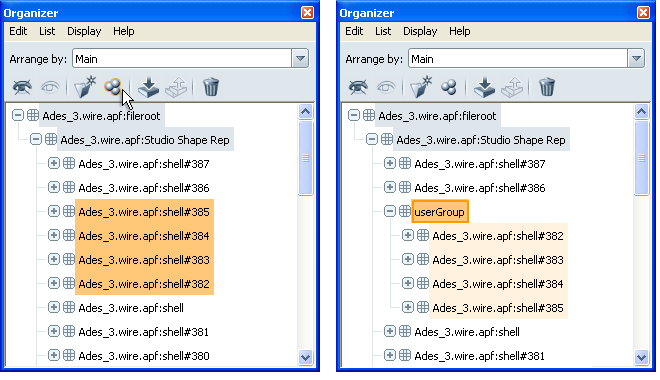
- In
the Organizer, select the objects you want to combine, then group
them. The objects are grouped into one folder.
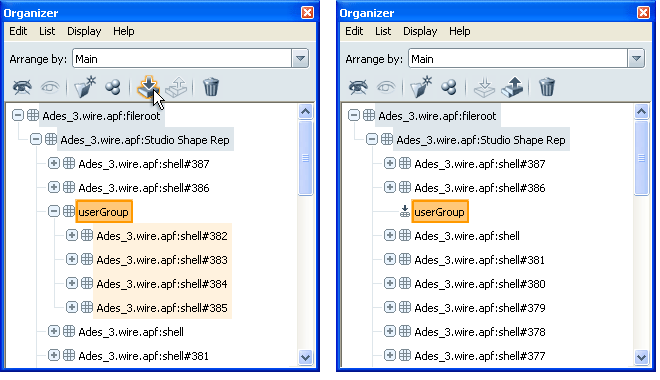
- Click the folder with the grouped objects,
and choose Combine (or click the Combine
button on the toolbar). The objects are combined, and you can no
longer expand the node to see its contents.
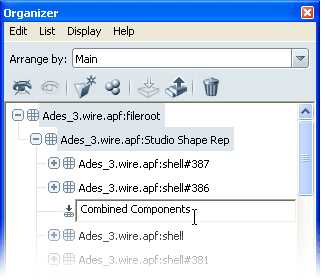
NoteDouble-click the
folder to folder to give it a more meaningful name.
Separate objects
You can separate combined
objects to gain access to parts of the combined geometry to work
with it (for example, to flip normals, to remove duplicate surface,
or to split geometry to add different alternatives or behaviors).
NoteSeparating
is not the same as undoing (Edit > Undo)
the combination operation. Separating retains the object hierarchy but
gives you access to combined objects; undoing reverts to the original
object hierarchies within a scene session.
To
separate combined objects:
- In the Organizer, select the combined
objects you want to separate.
- Right-click the selected objects, and
choose Separate (or click the Separate button
on the toolbar). The objects are separated, and you can now expand
the node to see its contents.


