The Keying Modes menu in the Key Controls window determines which properties of selected objects receive keyframes.
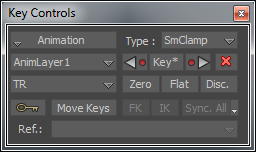
Key Controls window displays default TR Keying mode
For example, selecting the T option in the Keying Mode menu displays the visual keyframes only for a selected object’s translation curves on the Action timeline. This lets you add, edit, or delete keyframes on the object’s translation curves.
The items in the menu may change, depending on what you are doing in MotionBuilder (and depending on whether you have created custom keying groups which get added to the menu—see Creating a custom keying group). For example, working with certain windows and settings can influence the keyframing options in the Key Controls (see Context keying modes ).
The following table describes the default Keying modes:
| Keying Mode | Description |
|---|---|
| T | Displays keyframes associated with the selected object’s translation (T) curve. Select T to add a keyframe to the translation at the current timecode. |
| R | Displays keyframes associated with the selected object’s rotation curve. Select R to add a keyframe to the rotation properties at the current timecode. |
| S | Displays keyframes associated with the selected object’s scaling (S) curve. Select S to add a keyframe to the scaling properties at the current timecode. |
| TR | Displays keyframes associated with the selected object’s translation and rotation curves. Select TR to add a keyframe to the translation and rotation properties at the current timecode. Any change in scale is not keyframed. |
| TRS | Displays keyframes associated with the selected object’s translation, rotation, and scaling curves. Select TRS to add a keyframe to the translation, rotation, and scaling properties at the current timecode. |
| Current Camera | Adds a keyframe to the current camera’s translation, rotation, field of view and roll properties. The camera does not need to be selected, as long as it is the current camera. Select this group when you want to create camera animation (such as a walk-through). Keys are set for Translation (T), Rotation (R), Field of View, and Roll. |
| Selected Properties | Adds a keyframe to the selected properties only. You can select properties in the Properties, FCurves, and Dopesheet windows, as well as in an object’s settings, such as Light settings. |
 Except where otherwise noted, this work is licensed under a Creative Commons Attribution-NonCommercial-ShareAlike 3.0 Unported License


