The Keyframe buttons in the Key Controls window let you set, delete, and navigate through different types of keyframes. You can set keyframes on an object’s translation, rotation, and scaling properties, or for other properties such as a light’s cone angle. You can also set keyframes that have zero, flat, or discontinuous values, or keyframes specifically for Control rigs.
When you select an object and set a keyframe, a visual keyframe appears on the Action timeline in the Transport Controls at the current time.
For example, setting a keyframe on a selected cube with “T” as the Keying Group adds a keyframe to the object’s X, Y, and Z translation curves. If you delete any keyframes in the FCurves window, the remaining keys are still represented by visual keyframes.

A. Keyframes added to the selected object’s X, Y, and Z translation curves in the FCurves window B. A visual keyframe representing the three keys in the Transport Controls
The keyframe buttons consist of the following:
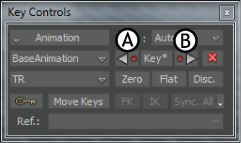
The Key button lets you set a keyframe to the selection at the current timecode. You can also press K to set keyframes. An asterisk indicates a keyframe at the current time.

Keyframe buttons A. Key button with an asterisk indicates a key at the current time
The Previous and Next buttons let you move between the keyframes that are part of the current keying group.
Key buttons A. Previous button B. Next button
To go back in the current take to previous keyframes, click the Previous button. To move forward to keyframes in the current take, click the Next button.
When using the Previous or Next buttons, the Timeline indicator moves to the position of the previous or next keyframe on the Action timeline in the Transport Controls and Dopesheet windows. If there is no animation, Previous and Next are not available.
The Delete button removes the keyframe at the current timecode for the selected object, function curve, and property.
For example, if the selected object has a keyframe for the Scale property’s X value at the current timecode, clicking Delete with Translation as the Keying Group deletes a keyframe from the selected object’s Translation curve. The keyframe for the Scale property’s X value is left untouched.
When there is keyframe animation in a scene but not at the current timecode, Delete is unavailable. If the selected object does not contain a keyframe for the selected curve and property, Delete does nothing.

Keyframe buttons A. Delete button not available B. Delete button available
You can also delete keyframes using the Delete option in the Transport Controls context menu.
To delete a selected keyframe or keyframe region, right-click the keyframe or region, and select Delete from the context menu. You can also press Delete on the keyboard. See Deleting keyframes and keyframe regions.
The Zero button lets you set a keyframe with a zero value for selected properties.
Clicking the Zero button sets a keyframe with a zero value and flat tangents for the selected properties.
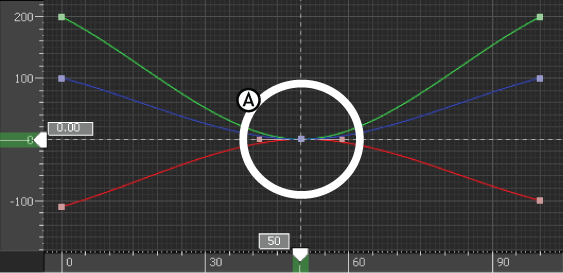
FCurves pane A. A Zero keyframe with flat tangents
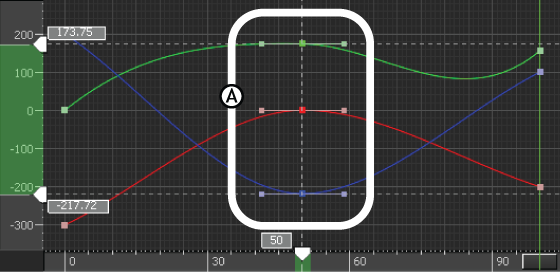
Right-clicking the Zero button sets a keyframe with a zero value for selected properties, but the tangent is not flattened.

FCurves pane A. Right-click the Zero button to set keyframes with a value of 0 and tangents that are not flat.
The Flat button lets you set a keyframe with flat tangents and Fixed interpolation. In the FCurves window, you can see that a keyframe’s tangents are flat when its tangent handles are horizontal.
If your character’s feet go through the floor, setting a Flat keyframe at that point prevents the slope of the original animation from overshooting or undershooting.
FCurves pane A. Keyframes with flat tangent handles.
You can also set Zero, IK, and FK keyframes with flat tangents. See Flat key.
The Discontinuity (Disc.) button lets you set a keyframe with discontinuous tangents.
In the FCurves window, you can see that the keyframe’s tangent handles point directly at the previous and next keyframes.

FCurves pane A. Keyframes with discontinuous tangent handles.
The Auto Key option lets you set keyframes automatically when it is active.
Key Controls window A. Auto Key option
When Auto Key is active, changing a value in the Properties window or transforming in the Viewer window automatically adds a keyframe at the current timecode for the edited value.
When Auto Key is disabled, you can manually add keyframes by changing the value of the selected property and clicking the Keyframe button.
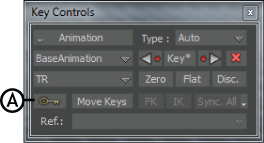
The Move Keys button lets you change the translation and rotation values of keyframes you have already set. For example, you can take a character’s walk-cycle in which the character walks in a straight line and change the animation so that the character turns part-way throughout the animation.
The Move Keys button is disabled when the Auto Key option is active (see Auto Key option).
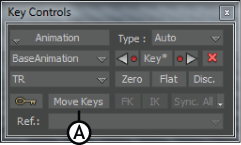
Key Controls window A. Move Keys button
When you select a Control rig effector or Auxiliary object, the FK button lets you make many changes and set keyframes with a single click.
When you create walk cycles or other character animation, setting keyframes at a single point in time can mean changing Reach values, interpolation, and tangent angles for different effectors to attain the effect you want. Using the FK button lets you make all these changes and set keyframes with a single click.

Key Controls window A. FK button B. IK button
Generally, the FK button lets you change Reach properties of a body part to a value of 0. Specifically, when part of a Control rig is selected, clicking the FK button does the following:
You can also choose to set a keyframe with Flat tangents, or no additional tangent behavior. See IK/FK Key Options menu.
Similar to the FK button, the IK button lets you make a number of changes and set different types of keyframes with one click, simplifying the character animation process.
Generally, the IK button lets you determine a Master pivot for body parts in a Control rig. Specifically, when part of a Control rig is selected, clicking the IK button does the following:
You can also choose to set a keyframe with Flat tangents, or no additional tangent behavior. See IK/FK Key Options menu.
The Sync menu lets you select between Sync and Sync All options. Selecting one of these options changes the behavior of the Sync button.
The Sync button is used for resolving the de-synchronization of keyframe animation for both Control rigs and Multi-Referential constraints.
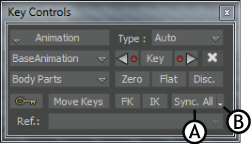
Key Controls window A. Sync button B. Sync menu
When the Sync option is selected in the Sync menu, use the Sync button when a switch between different references in a scene creates “jumps” in the animation.
In situations where there is a reference change, such as from FK to IK solving on a character, or in a scene with a character moving from a car to the street, then to an elevator with a Multi-Referential constraint, “jumps” are created when you change the timing or values of the keys of one of the references.
The Sync button tracks all the reference changes in the animation, correcting any inconsistencies by synchronizing the previous reference to the new one.
When the Sync All option is selected in the Sync menu, use the Sync button to correct any inconsistencies in all keyframes, not just those with different references.
 Except where otherwise noted, this work is licensed under a Creative Commons Attribution-NonCommercial-ShareAlike 3.0 Unported License


