You can customize the HUD element properties by adding a property of another asset or custom property. This helps to display more information regarding a scene in the Viewer.
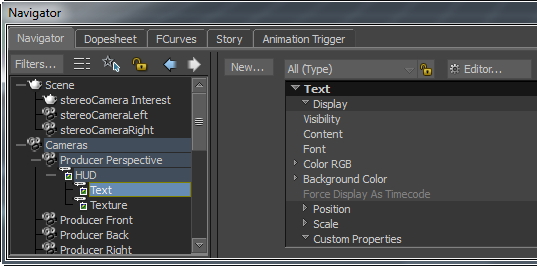
You can customize the HUD element properties by adding a property of another asset under the Resources > Asset Browser > Templates directory.
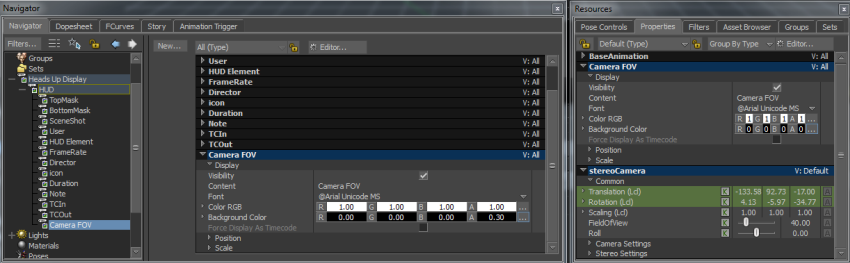
Each property of an object is referred as object_name.property_name in the Properties window. For example, the Field Of View property of the stereoCamera object is referred as stereoCamera.Field Of View.
To add a property of another object to the HUD element properties:
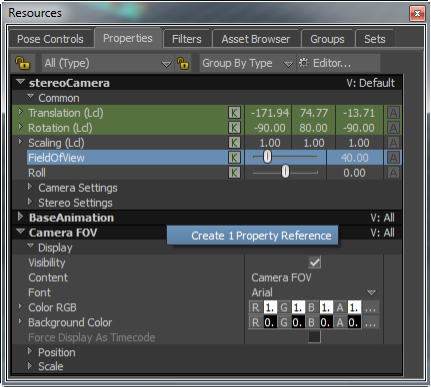
Both the properties of the Camera FOV HUD element and the stereoCamera asset appear in the Resources > Properties window.
The Create 1 Reference Property context menu option appears.

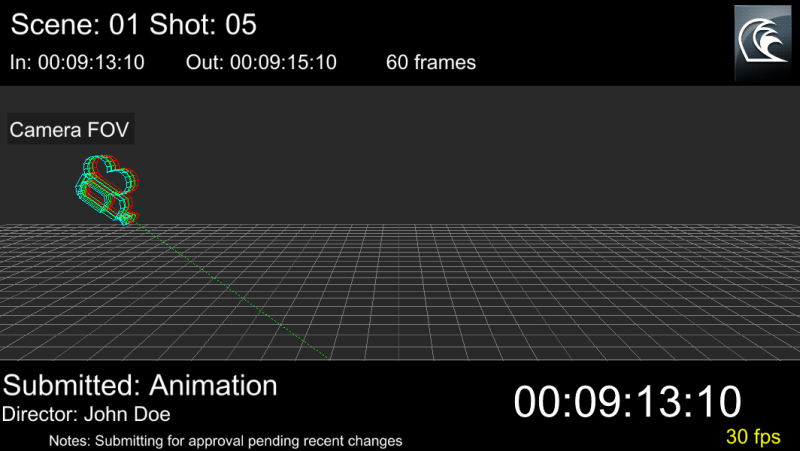
Viewer and Resources windows A. Field Of View property B. Field Of View property added to Camera FOV HUD element properties C. Field Of View property value
When you adjust the value of the Field Of View property, the change in value appears dynamically in the scene.
When you save a scene (in .fbx format), all the added HUD elements and their properties are also saved to reuse them in another scene.
You can customize the HUD element properties by adding a custom property from the Property Editor > Custom Properties window. This helps to display more information in the Viewer.
For more information on Custom Properties, see the Custom Properties pane.
To add a custom property to the HUD element properties:
In the following figure, the Number custom property is added to the Duration HUD element.
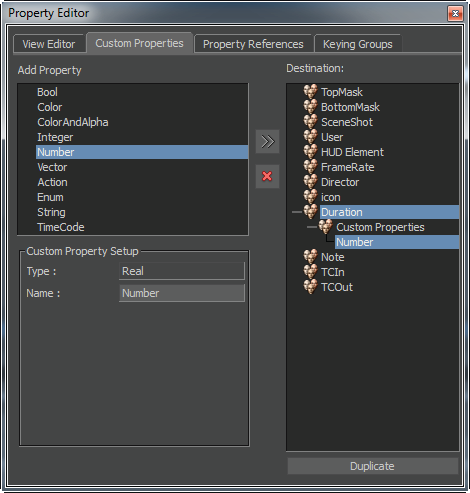
The Number custom property appears in the Duration HUD element properties.

 Except where otherwise noted, this work is licensed under a Creative Commons Attribution-NonCommercial-ShareAlike 3.0 Unported License


