The Constraint settings contain controls that let you activate, offset, lock, and set other factors that govern the behavior of your constraints. These features are found in both the Navigator and Properties window constraint settings (see the following figure, A and B).
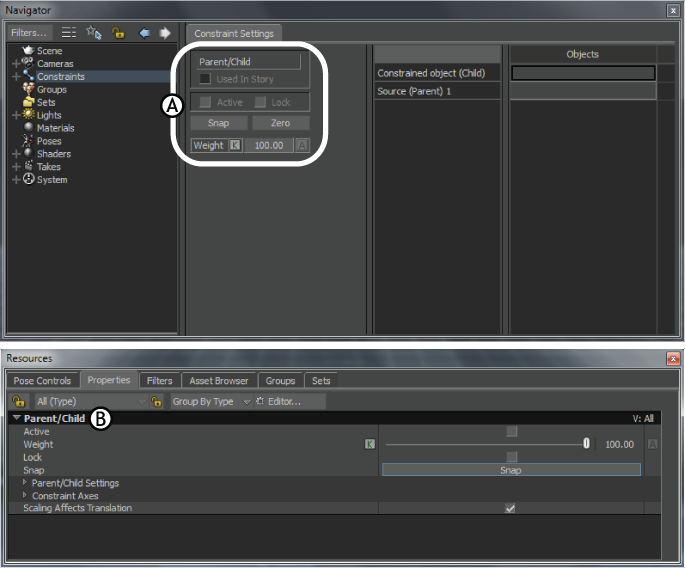
Constraint settings A. Navigator window B. Properties window
The Constraint Type field shows the kind of constraint that is selected, for example “Relations” or “Position”. This is useful if you have renamed the constraint, as it always shows you what kind of constraint it was originally.
The Used In Story indicator displays if the current constraint is used by the Story window. The Story window lets you schedule when constraints are active.
By changing a constraint’s status when it is active, you can simulate changes in a character’s environment, switch and blend between different constraints, and fade constraints in and out.
Enable Active if activating the constraint changes the position of the object being constrained. For example, when you activate a Range constraint, the constrained object moves on top of the source object when Active is enabled.
Activate Lock to lock the position or rotation of the constrained object. This locks the constrained object so you cannot move it while the constraint is activated.
For example, in a Position constraint where two markers influence the position of a third marker, you can translate the third marker after the constraint is activated. You can do this in order to add a local offset to the constrained object.
Once you have applied an offset to the constrained object, activate the Lock option to save the offset. If you disable the constraint, translate the constrained object, then activate the constraint again. The constrained object returns to the position it was in when you originally enabled the Lock option. This is illustrated below.
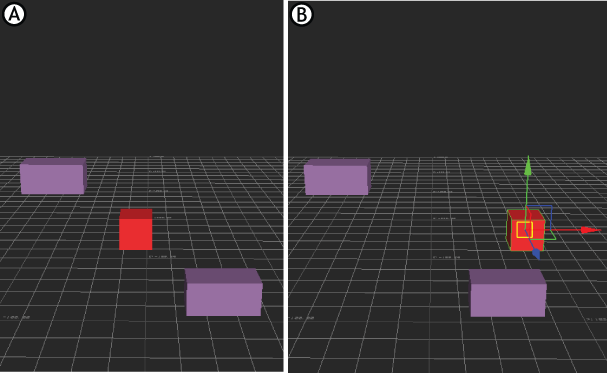
You can move the constrained object after activating the constraint. A. Before activating the constraint B. After activating the constraint.
Locking a constraint stops you from accidentally moving an object, which would prove unfortunate if you had spent time fine-tuning its position or rotation.
If you have plotted data to a model used in a constraint, it is recommended that you disable the constraint. Otherwise, the source object controls the model and not the model’s data.
Click Snap to create an offset between the position, rotation, or scale of the constraint and the current position of the object being constrained. Snap is used when repositioning the constrained object and adding offsets.
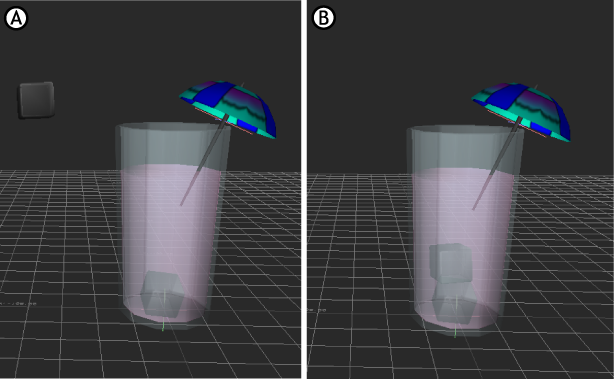
Snap example A. The ice cube in a parent/child constraint before Snap is activated B. The ice cube after Snap is activated, inside the glass.
When you click Snap, the constraint is activated, but the offset between the constrained object’s current translation and rotation and its constrained translation and rotation is kept. This is useful when you want to activate a constraint, but you do not want to change its current position or rotation.
When a constraint is active, you can translate and rotate the constrained object to change its local offset. Click Snap to save the new offset. Disable the constraint, translate the constrained object, and then activate the constraint again. The constrained object returns to its position from the last time you clicked the Snap option.
| Snap and the Chain IK constraint |
|---|
| Clicking Snap with a Chain IK constraint does not move Pole objects. If you set the Chain IK Pole Type to Object in the Chain IK settings’ Pole Type menu manually overrides the Pole Vector, causing the chain to flip or move after Snap is activated. |
Click Zero to remove the translation and rotation offset between the source and the constrained object.
For example, if two markers are constrained using the Position constraint, an offset is established between the markers.
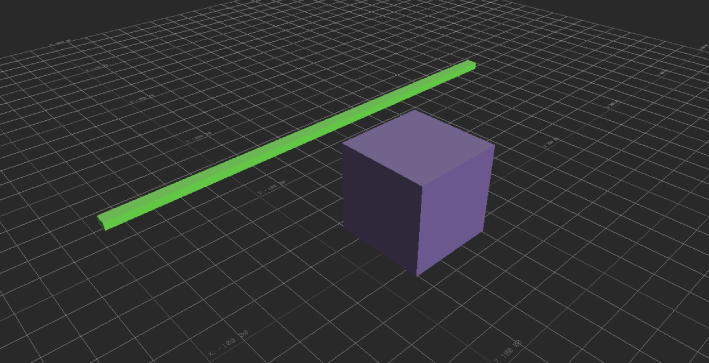
A cube is constrained and offset from its source object, the rod.
If you click the Zero option for this constraint, the offset is removed and the constrained object is placed at the position of the source object.
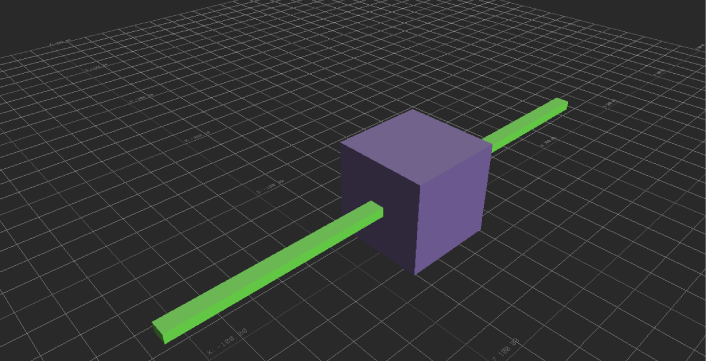
Click Zero to remove the offset and align the axes to the cube and rod.
Zero works only with constraints that use source and constrained objects.
Use the Weight setting to control the level of activity of the constraint and create constraint “blends”. The default Weight value is 100%, meaning that the constraint is fully active.
A weight value of 50% indicates that the affected constraint is half as active, and a value of 0% would makes the constraint completely inactive.
For example, if you set the weight for a Position constraint at 50%, the position of the constrained object is halfway between its original position and the position of its source object.
The Weight value can also be animated or used in a Relations constraint.
The Story window can be used to perform the same function on multiple constraints.
 Except where otherwise noted, this work is licensed under a Creative Commons Attribution-NonCommercial-ShareAlike 3.0 Unported License


