The basic material settings let you see results in the Viewer window without applying shaders. When you disable the Advanced Mode option in the Material settings, the settings that are still active are the basic ones that do not require shaders. The results of these basic material settings always display on the model to which the material is applied.
To use the basic material settings effectively, see Adjusting material color and Adding a texture to a material.
The Emissive settings let you define the RGB color and intensity for the glow of a material. The Emissive color of an object is constant and uniform.
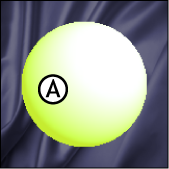
Material proxy A. Emissive color set to a bright yellow-green
The Ambient settings let you define the RGB color and intensity of the light reflected by a material. Ambient color is the general brightness of the material and comprises the dark range of color in a material’s contrast.
The Ambient color of an object depends on the lighting in your scene.
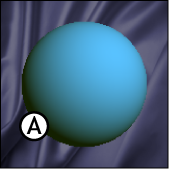
Material proxy A. Ambient color set to a dark green
The Diffuse settings let you define the base RGB color and intensity of a material. Diffuse color comprises the light range of color in a material’s contrast.
The Diffuse color of an object is uniform and constant. It relies on the position and color of the lights in your scene and is not affected if you change the current camera view.
The Diffuse color settings define the main color of the model. The Diffuse color settings interact with any texture attached to the Diffuse property.
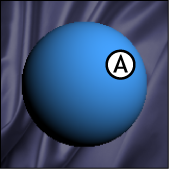
Material proxy A. Diffuse color set to a shade of blue
The Specularity settings let you define the RGB color and intensity of a model’s specular highlights, or “shiny” areas.
The specular color of an object depends on the shine of an object, the position of your light sources, and the current camera view.
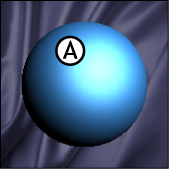
Material proxy A. Specular highlight set to a light blue
The Shininess slider lets you define the level of light reflected on a material. Adjust this slider to control the distribution of an object’s specular highlight.
Low values result in a large, soft glow, and high values define a smaller, sharper highlight. For the best results when adjusting the Shininess value, also play with the color and intensity of the Specularity settings.
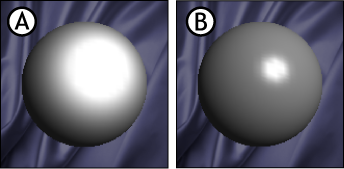
Material proxy A. Material with low Shininess value B. Material with a high Shininess value
 Except where otherwise noted, this work is licensed under a Creative Commons Attribution-NonCommercial-ShareAlike 3.0 Unported License


