Map your texture on a model according to its UV coordinates, using a designated wrap option (XY, YZ, XZ, Spherical or Cylindrical), or by projecting it (Projection or Environment).
You can specify the mapping settings for your texture using the Mapping Method menu. See Choosing a mapping method and Mapping Method.

Texture mapping methods A. XZ map B. Projection map C. Spherical map
This option uses the model’s UV coordinates that are assigned to the vertices of your model and is most useful when the model was unwrapped.
A model can have different sets of UV coordinates, which are referred to as UV sets or Map channels. To select a different UV set, see UV Set.
Use the XY, YZ, or XZ options to map a selected texture to a specific face (XY, YZ or XZ) of the model’s bounding box, and then project the face onto your model.
An example of each mapping style is shown below.
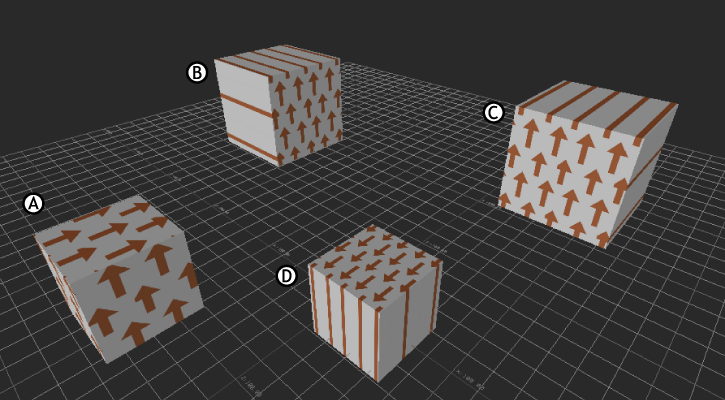
Texture mapping methods A. UV mapping B. YZ mapping C. XY mapping D. XZ mapping
Use the Spherical or Cylindrical mapping options to wrap your texture around a model that has a shape similar to a sphere or cylinder. Each method distorts the image in different ways and introduces a different seam. In the following image, a simple striped texture is mapped to two spheres, one using Spherical wrapping and one using Cylindrical mapping.

A. Spherical mapping B. Cylindrical mapping
When you wrap a texture around a model, there is always an area where the sides of the image meet. This area is called the seam. The visibility of the seam depends not only on the selected mapping type (Spherical or Cylindrical), but also on the model and the image.
It is recommended that you use an image that can be tiled to reduce the size of the seam. An image you can tile has opposite sides that match each other. You can easily create a tiling image with most common commercial paint programs.
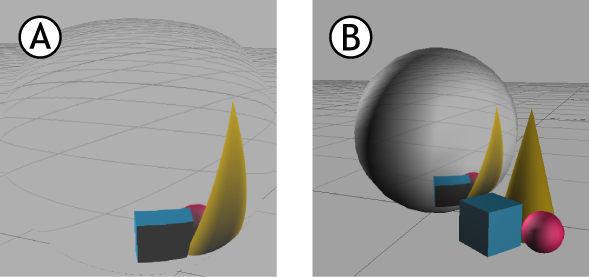
Projection mapping projects the image straight onto the object, like a slide projector, creating a two-dimensional image that does not “wrap” around the object. The following figure shows the result of Projection textures that do not work well with curved objects.

Projection textures on curved object
The image is always projected from the current camera’s viewpoint.
Use the Environment mapping option to project spheroid textures. You can use this mapping method to create special effects such as skyscapes, or to simulate reflections on objects.
Environment mapping is best suited for situations when you are filming a model or scene from a single point of view. This mapping method sacrifices realism that may be noticeable from many different angles or when filming the model using a moving camera.
For example, the following figure shows a spheroid image applied to a sphere. The Environment mapping method adds extra curvature to the image. Also, when the camera or object moves, Environment mapping allows the texture to move with the model, without the need to adjust the texture further. To obtain the most realistic results, the camera or object should only be moved slightly if moved at all.
A. Original spheroid image B. Applied to sphere using Environment mapping method
 Except where otherwise noted, this work is licensed under a Creative Commons Attribution-NonCommercial-ShareAlike 3.0 Unported License


