


The Weighting Options pane lets you change the colors for displaying the weight of vertices, change the appearance of the model, select bones automatically, and so on.
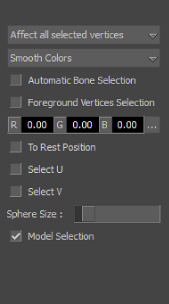
Weighting Options pane
The following options in the Affect field let you determine which vertices are affected by the modification of weight values:
| Option | Description |
|---|---|
| Affect all selected vertices | Applies weighting changes to all the vertices selected in the Vertex list. |
| Affect first selected vertex | Applies weighting changes only to the first vertex selected in the Vertex list. |
The following options in the Color Options field let you determine the color of selected bones and vertices:
| Option | Description |
|---|---|
| Smooth Colors | Displays vertices with a blend of color from all the bones that influence them. The stronger the color of the bone in the blend, the greater the weight applied on the vertex for that bone. For example, if a red bone and a yellow bone influence a group’s vertices, these vertices display in orange. If the orange vertices color shifts closer to red, this indicates that the red bone is applying the greater weight to the vertices. |
| Most Influential Bone | Draws vertices using the color of the bone for which they are most weighted. |
| Least Influential Bone | Draws vertices using the color of the bone for which they are least weighted. This option detects and corrects useless weights, thus optimizing the character’s performance. |
When activated, Automatic Bone Selection chooses the bones that influence selected non-zero weight vertices. This is an easy method of finding influential bones. When you select vertices with Automatic Bone Selection disabled, the selected bones do not show.
When active, Foreground Vertices Selection lets you choose only the vertices located in the foreground of a scene. When disabled, Foreground Vertices Selection lets you choose both foreground and background vertices.
Changes the color of bones using RGB values. These color values determine the color that displays in the Color column of the Weights list. See Changing Bone Colors.
When active, To Rest Position displays the selected models in the Model List using the position they were originally created in. This position is referred to as the rest position. Before adding bones to your model’s rest position, you must activate To Rest Position.
For example, in the follwoing image, A and B show the position of a character’s arms when To Rest Position is active and disabled. If you activate the rest positions of models that do not depend on each other, or if you use the same bone in several different models because they use different resting positions, your results may be unpredictable. This option uses the same name order as names in the Model List.
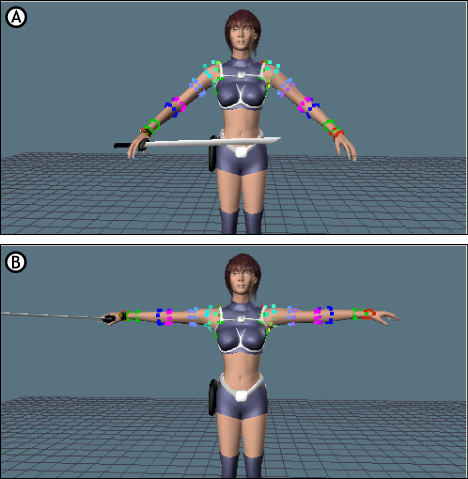
Rest Position A. To Rest Position disabled B. To Rest Position activated
When active, Select U selects all the vertices in the Vertex list that belong to the same U coordinate for a given series of control points of a NURBS surface.
When active, Select V selects all the vertices of the Vertex list that belong to the same V coordinate for a given series of control points of a NURBS surface.
Adjusting the Sphere Size slider changes the size of joints. This is useful if you are using a model that uses nodes or joints to represent a skeleton instead of bones. Sphere Size only changes the visual representation of your skeleton.
When active, Model Selection lets you choose the surrounding models when selecting a bone. When disabled, Model Selection lets you choose bones without selecting their surrounding models.
For additional information on weighting vertices, see Skin.
While adjusting weights, many bones that are close to each other may use the same or similar colors. To clearly distinguish a bone. you may want to change its color. The colors assigned to bones are random, but you can change their color. To change the color of a bone, click the color box in the Weights list corresponding to the bone you want to change. Use the color fields to select a new color for the bone. As you change the color, the color and gradients of its weighted vertices update. This makes it easier to choose the best color for the selected bone.
 Except where otherwise noted, this work is licensed under a Creative Commons Attribution-NonCommercial-ShareAlike 3.0 Unported License