The Display menu contains options that let you define which assets to display in the Viewer window and how to display them.
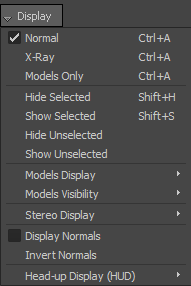
The Normal Display menu option sets the current camera view to Normal Display mode, which displays all assets. Normal is the default viewing mode.
The X-Ray Display menu option sets the current camera view to X-Ray mode, which displays the skeleton of a model, Nulls, and elements. In this mode, you can select and edit skeletons normally hidden by models, but you cannot select models.
The Modes Only Display menu option sets the current camera view to Models Only mode, which displays models only and hides all Nulls, lights, cameras, and other elements.
The Hide Unselected Display menu option hides elements and models that are not selected in the scene.
The Show Unselected Display menu option displays elements and models that are not selected in the scene.
The Models Display menu option contains global shading options that apply to the entire scene.
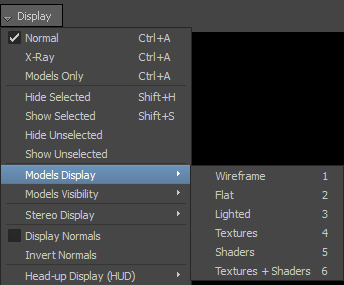
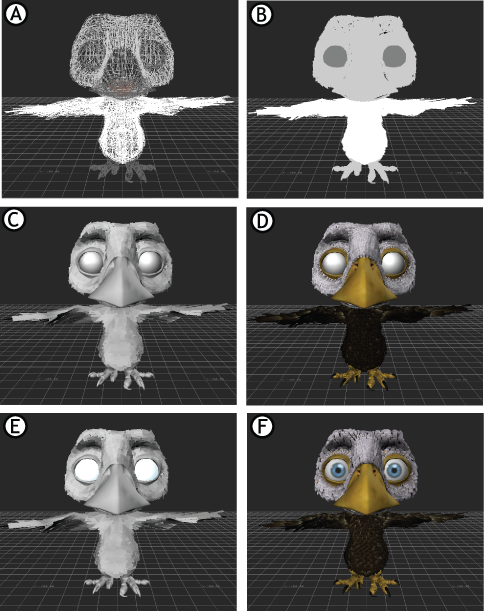
Models Display options A. Wireframe B. Flat C. Lighted D. Shaded E. Textured F. Shaded & Textured
The Models Display menu options are:
| Models Display option |
Description |
|---|---|
| Wireframe |
Displays selected objects as wireframe. |
| Flat |
Displays selected objects using a constant color. This option ignores light sources in a scene, and overrides any custom shading, textures, and materials applied using the Shader settings. See About shaders. |
| Lighted |
Displays selected objects using their custom shaders created in the Shader settings. Textures do not display. |
| Textures |
Displays selected objects with their applied textures. This option is available only when the Lighted option is selected, in which case Use Textures is active by default. See Textures. |
| Shaders |
Displays selected objects using the default shader. This option is available only when the Lighted option is selected, in which case Use Shaders is active by default. |
| Textures + Shaders |
Displays selected objects with both the default shader and their applied textures. |
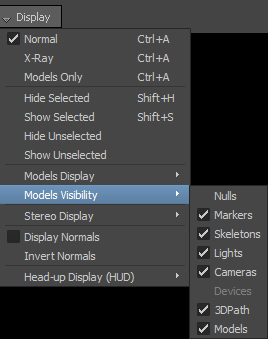
The Models Visibility Display menu option hides or displays selected assets in the Viewer window. For example, when Skeleton is disabled, all skeletons are hidden in the Viewer window.
The Visibility menu lets you hide or show Nulls, Markers, Skeletons, Lights, Cameras, Devices, 3DPath, and Models.
The Stereo Display menu option contains camera views that apply to the entire scene.
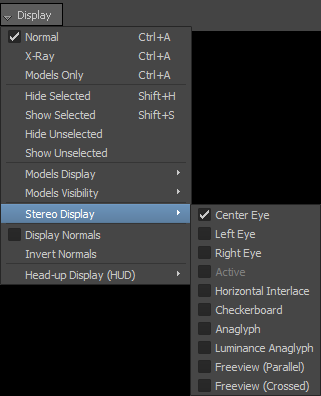
The Stereo Display menu includes the following stereo views:
See Stereo cameras.
The Head-up Display (HUD) menu option enables you to display frame rate, memory usage, time code, and safe area.
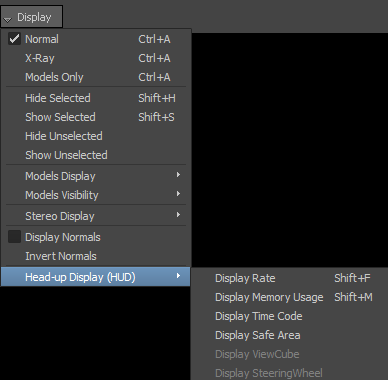
The following table describes the Head-up Display menu options.
| Head-up Display option |
Description |
|---|---|
| Display Rate |
The HUD Display Rate displays MotionBuilder operational statistics in the top-left corner of the Viewer window. Because MotionBuilder is a multi-thread application that uses a dual-buffer system, it evaluates the upcoming frame ahead of rendering it. The Frame rate displays the internal frame rate in MotionBuilder. Frame rate = ex/60 (Min: 60, Max: 60) 16.7 ms. 60 is the number of frames the video card renders per second. 16.7ms (milliseconds) is the amount of time needed to render one frame. The remainder of the second is used for non-viewer rendering, for example interface interactions. The Evaluation rate displays the evaluation rate = ex/227,1 (Min: 160.3, Max 278.1) 4.4ms. 227.1 is the number of evaluations per second, and 4.4ms is the evaluation of the other components outside the Viewer window. The Frame time (ms) displays the frame time = ex/16.6 ms (Idle time: 0.1ms) 16.6ms is the total time to compute and display the Viewer window. EvalWait is the time the render thread waits for the Evaluate thread to finish and then starts drawing the next frame. EvalWait: Evaluation Time – (Texture + Render + Swap + Idle) Idle time is the time needed to compute and display the rest of the interface (for example, the Idle time decreases when you switch to Full Screen mode because other elements of the interface are not displayed. The Evaluation displays the Single and Parallel Evaluation settings: Single refers to the mode that MotionBuilder uses to evaluate deformations. Single means deformations are being evaluated on one thread only. Parallel refers to the pipeline that MotionBuilder uses to evaluate a scene. Parallel means that the application either calculates and displays simultaneously, or is always calculating. NoteYou can change the color of the statistics display. See the HUD preference settings in the Viewer preferences.
|
| Display Memory Usage |
The HUD Display Memory Usage displays the amount of free memory and of free recording memory. These appear in the top-right corner of the Viewer window. |
| Display Time Code |
The HUD Display Time Code displays or hides the current timecode in the Viewer window. |
| Display Safe Area |
The HUD Display Safe Area activates Display Safe Area to show the safe display area for all cameras. The safe display area contains two different safe guides: the safe title guide (yellow) indicating the area in which titles should be placed, and a safe action guide (red) indicating the recommended area in which motion and animation should take place. If you do not observe these areas, titles and animation may be cropped when transferred to video. You can choose between a square safe area and a round safe area in the Camera settings. |
| Display ViewCube |
The HUD Display ViewCube enables you to either display or hide the ViewCube. NoteThe ViewCube Preferences need to be set to Show the ViewCube to show or display the HUD's display of the ViewCube.
See ViewCube. |
| Display SteeringWheel |
The HUD Display SteeringWheel enables you to either display or hide the SteeringWheels. NoteThe SteeringWheels Preferences need to be set to Show SteeringWheels to show or display the HUD's display of the SteeringWheel.
See SteeringWheels. |
 Except where otherwise noted, this work is licensed under a Creative Commons Attribution-NonCommercial-ShareAlike 3.0 Unported License


