When you select Auto from the Interpolation Mode menu, options and settings that let you manipulate Auto curves display in the Dynamic Editor.
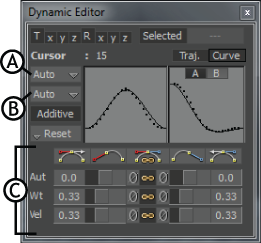
Dynamic Editor A. Auto interpolation mode B. Auto and Auto options displayed in the Interpolation Options menu C. Auto settings displayed in the settings area
The Auto settings in the Dynamic Editor consist of the following:
When Auto is selected in the Interpolation Mode menu, the Interpolation Options menu lets you select Auto or Fixed mode. Selecting the Auto option produces the same behavior as the Auto tangents button on the FCurves window toolbar. Selecting the Fixed option produces the same behavior as the Fixed tangents button on the classic FCurves window toolbar. See Auto option for information.
The Break option splits the tangent and lets you manipulate the left and right tangents separately. The Additive option should be active when you use the Break option.

Dynamic Editor A. Break button disabled
The two Flat buttons (A and B) let you flatten the left and right tangents of current keyframes. The Flat button on the left affects the left tangent, and the Flat button on the right affects the right tangent.

Dynamic Editor A. Flat Left button B. Flat Right button
Clicking the left or right Discontinuity button causes the left or right tangent to point to the previous or next keyframe. Clicking the Discontinuity button on the left causes the left tangent to point to the previous keyframe. Similarly, clicking the Discontinuity button on the right causes the right tangent to point to the next keyframe.
Dynamic Editor A. Discontinuity Right button B. Discontinuity Left button
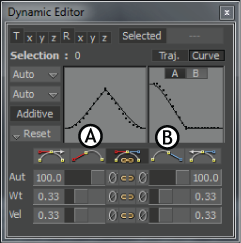
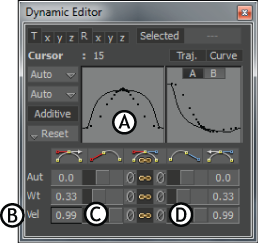
The Auto settings let you change the value of tangents to the left and right of editable keyframes.
Changing tangent angles A. Animation representation showing an angle change B. Auto settings C. Field and slider affecting the left tangent D. Field and slider affecting the right tangent
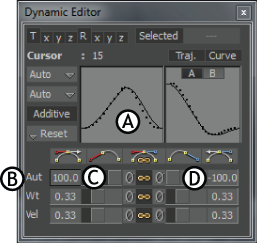
The Auto settings include two fields and sliders (A and B) which let you change the value of the left and right tangents of editable keyframes. The field on the left side affects the left tangent, and the field on the right side affects the right tangent.
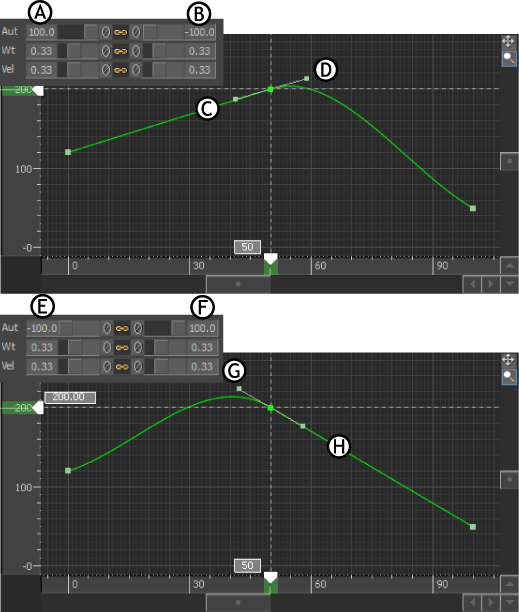
Editing tangent angles using Auto settings A. Left Auto field set to 100 B. Right Auto field is set to -100 C. Left tangent pointing to the previous keyframe D. Right tangent pointing away from the previous keyframe E. Left Auto field set to -100 F. Right Auto field set to 100 G. Left tangent pointing away from the next keyframe H. Right tangent pointing to the next keyframe
When you use the Auto settings, the tangents of editable keyframes are automatically calculated based on the values of neighboring keyframes.
Keyframe with Auto interpolation A. Tangents are the average between the previous and next keyframes B. Previous keyframe C. Next keyframe
The values in the left and right Auto fields change the angle of tangents as described in the following table.
| 0 | At 0, the curve represents the average between the previous and next keyframes. |
| 100 | When the left Auto field is at 100, the left tangent points to the previous keyframe (A and C). When the right Auto field is at 100, the right tangent points to the next keyframe (F and H). |
| -100 | When the left Auto field is at -100, the left tangent points away from the next keyframe (E and G).When the right Auto field is at -100, the right tangent points away from the previous keyframe (B and D). |
The Weight settings let you create curves that you cannot create with unweighted tangents.
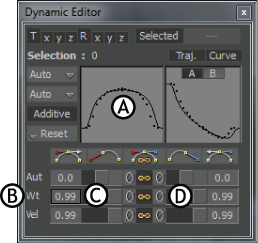
Changing weight A. Animation representation showing the weighting change B. Weight settings C. Field and slider affecting the left tangent D. Field and slider affecting the right tangent
The Weight settings include two fields and sliders (C and D) which let you change the weight of the tangents for the current keyframe. The field and slider on the left side affect the left tangent, and the field and slider on the right side affect the right tangent.
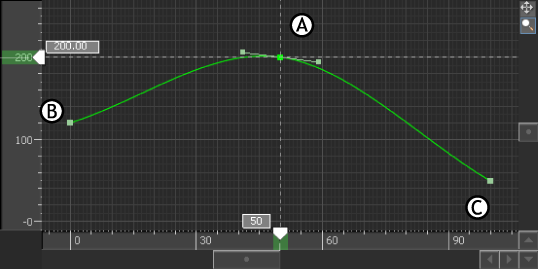
The Velocity settings let you speed up or slow down animation on either side of a keyframe without changing the trajectory of the animation. Unlike Auto and Weight settings, Velocity changes the animation in time, but not in space.
In the Dynamic Editor, the trajectories in the animation representation area display velocity changes. The dots of the trajectory, which represent time, move closer together to show an acceleration and move further apart to show deceleration.
Changing velocity A. Trajectory representation showing a velocity change B. Velocity settings C. Field and slider affecting the left tangent D. Slider and field affecting the right tangent
The Velocity settings include two fields and sliders (C and D) which let you change the animation speed to the left and right of editable keyframes. The field and slider on the left side affect the left tangent, and the field and slider on the right side affect the right tangent.
Velocity settings work when the speed of the animation changes without changing the trajectory of the animation. That is, the trajectory of the animation remains the same but its function curve is weighted.
For the Velocity settings to work, you must edit the XYZ values of a property at the same time, or edit the X, Y, or Z values that change during the animation.
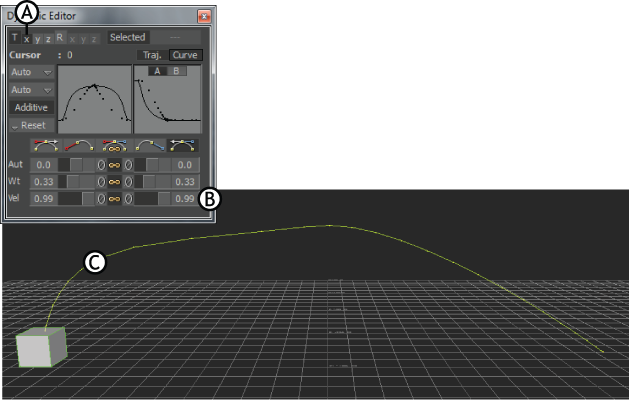
For example, in the following figure, keyframes are set for the X, Y, and Z values of a cube’s Translation property. However, the cube moves only along the X-axis and Y-axis during the animation, and the Z value remains the same throughout. The cube’s trajectory before any changes are made is an arc.
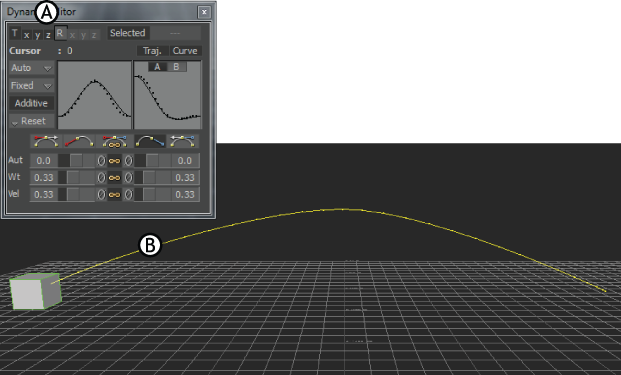
Animation before velocity changes A. XYZ Translation property values are shown selected B. Cube trajectory along the X-axis and Y-axis, in an arced path
In the following figure, using Velocity does not work, because only the X value is selected and modified. The cube’s trajectory is changed as a result.
Bad example using Velocity settings to change the animation speed A. X Translation property value selected B. Velocity settings changed C. Result: The cube’s trajectory changes instead of the cube’s animation speed.
This is an undesired result, which also occurs if, for example, only the Y value is selected, or if the X value or Y value is selected as well as the Z value. Selecting only the Z value has no effect at all, because the value does not change during the animation.
For the Velocity settings to work in this situation, both the X value and the Y value must be selected. When the Velocity settings are changed, the cube’s trajectory remains the same and the cube speeds up and slows down during the animation.
The Velocity settings would also work in this situation if all three XYZ values were selected. In some situations, selecting all XYZ values for selected keyframed properties can be simpler when using the Velocity settings.
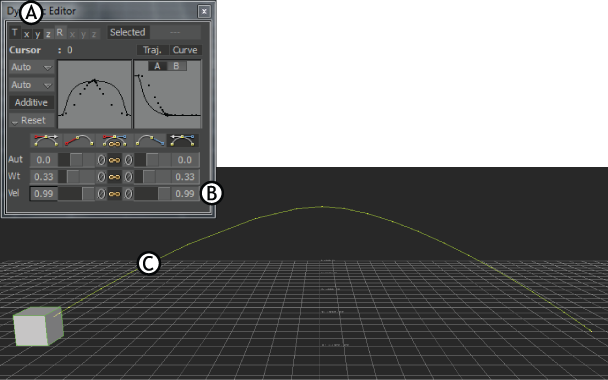
Good example using Velocity settings to change the animation speed A. X and Y Translation property values selected B. Velocity settings changed C. Result: The cube speeds up and slows down during the animation.
In addition, while you can easily use the Dynamic Editor and the FCurves window together, you may notice that the FCurves window does not have Velocity settings. In fact, when you use the Velocity settings, you change the angle and weight of tangents in such a way that the speed of the animation is modified without modifying its trajectory. The values of the Angle and Weight settings in the FCurves window reflect this when you use the Velocity settings in the Dynamic Editor.
The Auto, Weight, and Velocity settings each include two reset buttons (A and B), which let you reset left and right parameters.
Dynamic Editor A. Reset button for left tangent B. Reset button for right tangent
The Reset buttons in the Auto settings let you reset the angle of the left and right tangents to zero. The Reset buttons in the Weight settings let you reset the weight of the left and right tangents to 0.33. The Reset buttons in the Velocity setting let you reset the speed of the left and right tangents to 0.33. You can also reset all three parameters at the same time. See Resetting interpolation for more information.
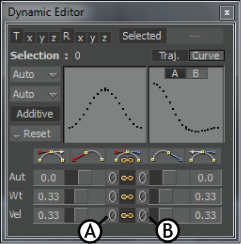
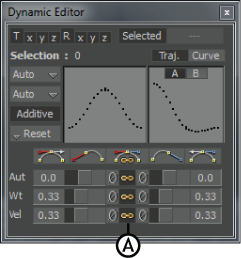
The Auto, Weight, and Velocity settings each include a Link option. When the Link option is active for a particular, you can modify the angle, weight, or velocity of both left and right tangents at the same time, whether or not the tangents are broken or unbroken.
You can modify the angle of each tangent separately when the Link option is disabled and the Break option is active (see Break). When the Link option is active, you can modify the angle of each tangent separately if you drag a tangent handle in the FCurves window.
Dynamic Editor A. Link option
 Except where otherwise noted, this work is licensed under a Creative Commons Attribution-NonCommercial-ShareAlike 3.0 Unported License


