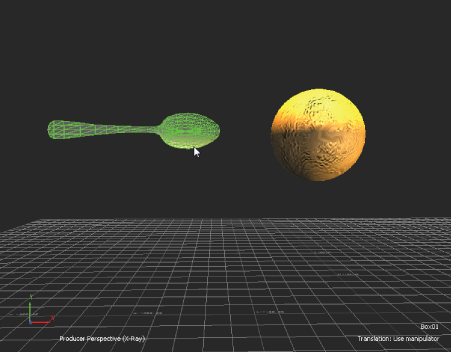
This example shows two models, Orange, and Spoon. This workflow shows a joint applied to the models that is then set so that
Orange swings from the end of Spoon.
Note Use the polySphere element in the Asset browser when you require a sphere model for Physics solves. The Elements folder Sphere
"element" has geometry that may produce unpredictable results.
To connect multiple objects in a chain, see Creating a Joint chain reaction.
To create joint behavior between two or more objects:
- Press Ctrl-A until you are in X-Ray mode.
- From the Asset browser Solvers folder, drag a Physics solver into an empty area of the Viewer window.
- Drag a Rigid Body Physical property from the Asset browser Physical Properties folder onto each object you want to join.
In this example, a Rigid Body property is added to the Spoon object.
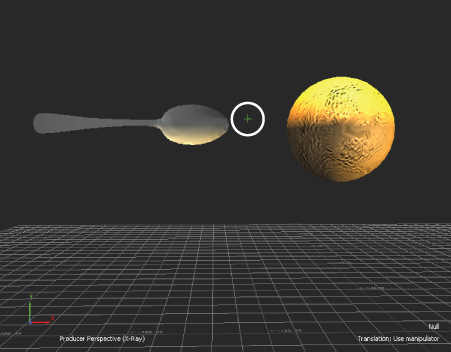
- Drag a Null element from the Elements folder into the Viewer window and position it between the objects for which you want
joint behavior. This null becomes the pivot from which the joint action is based.
You can use any object as a pivot point, but the joint orientation for physics is read from the local orientation of the pivot
object.
- Expand to the Navigator window Physical Properties folder. Click the Rigid Body property for the object that the second object
is to swing from and switch to the Setup pane. Select Passive from the Activation menu.
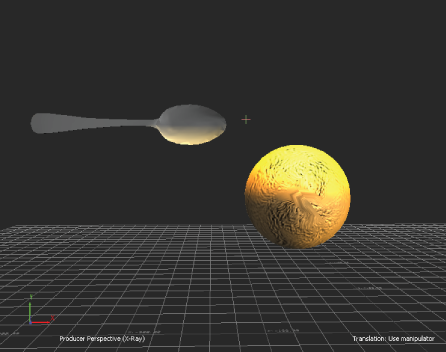
In this example, the spoon remains still and the orange swings from it, so the spoon object is set to Passive.
- From the Asset browser Physical Properties folder, drag a Joint Physical property onto the null in Viewer window.
- Select Joint in the Navigator window Scene browser and expand Setup and ensure that the Joint is set to Active. Then select
the affected objects in the Null Joint Connections asset list.
In this example, the Orange and Spoon are the affected objects.
You can also drag objects to the asset list, which lets you choose the hierarchy order by the order in which you selected
the objects. In this example, if you select Spoon first, it becomes the parent, and if you select Orange first, it becomes
the parent.
- Select a Joint Type from the Joint pane Type menu. See Joint types for a description of different joints and their behaviors. See Joint settings for more details about what each setting represents.
- Switch to the Scene browser Solvers > Physics Solver folder. Double click Solver to expose the Solver pane, and click Online.
Tip You can also click the Active option in the Physics Solver properties in the Properties window.
- Click Set Start State to set a position to which the objects can return.
- Expand the Physical Properties and define specific properties for the object in the Joint settings, as well as in the Solve,
and Animation panes.
- Double-click Solver in the Scene browser Physics Solvers folder to expose the Solver pane and click Live.
Note When you set the Physics Solver to Live, if you select an object that has a Physical property, such as Ragdoll, Rigid Body,
or Joint attached to it, you must deselect the object otherwise the object will ignore the Physics Solver. This is because
selecting the Physical property object when the Physics Solver is Live during recording re-evaluates the FCurves based on
the Frame Rate shown in the Transport Controls.
 Except where otherwise noted, this work is licensed under a Creative Commons Attribution-NonCommercial-ShareAlike 3.0 Unported License