To define the floor for characters:
- Double-click an uncharacterized character in the Scene browser to open the Character Settings, then activate the Lock option
 or
or  to keep the settings open throughout this procedure.
Your character must be uncharacterized so that you can edit the Mapping List.
- Do one of the following:
- If you want each hand and foot that contacts the floor to have its own floor defined, drag an object (such as a marker) into
the scene for each hand and foot.
- If you want to define only one floor surface for all hands and feet, drag only one object into the scene.
NoteThe type of object that you choose is not important. You can use a plane, marker, null, or another object.
- Assign the object(s) to represent the floor for the feet and hands by Alt-dragging them into the Left Foot Floor, Right Foot
Floor, Left Hand Floor, or Right Hand Floor nodes of the Mapping List.
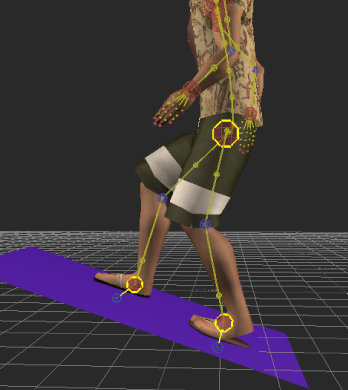
- Translate and rotate the floor object(s) to represent the type of terrain you want to your character’s feet and hands to respect.
For example, if you want the character to walk on a sloped floor as shown in the following figure, rotate the floor object
to represent the angle you want the character to walk on.
- Characterize the character.
- Define and activate the floor contact markers for the feet and hands of the character in the Character Settings, if you have
not already done so.
As you move and animate your character, the feet and hands now respect the level and orientation of the object you defined
as the floor.
 Except where otherwise noted, this work is licensed under a Creative Commons Attribution-NonCommercial-ShareAlike 3.0 Unported License