In the following procedures, you create a Character track in the Story window, define the character affected by the track, and add animation.
See Prepare the scene.

Navigator window Story
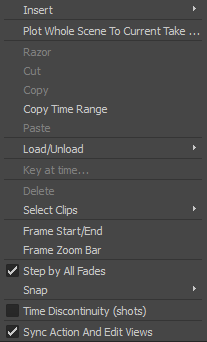
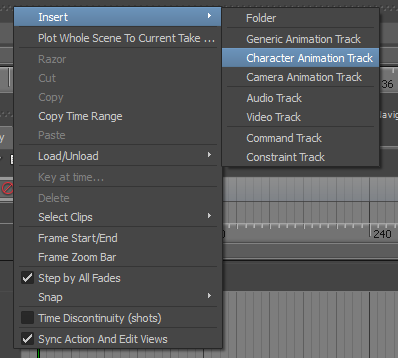
Action Track context menu
 Character Animation Track.
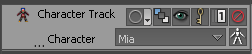
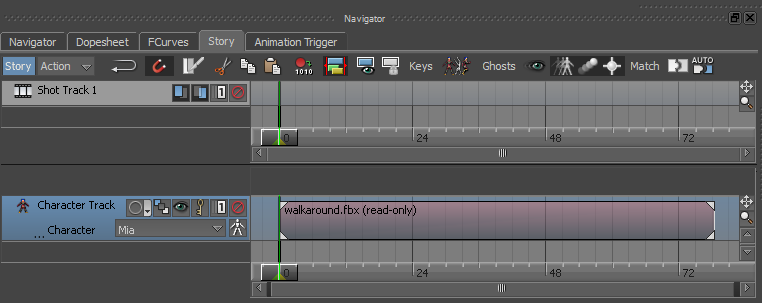
A Character Track is added in the Story window Action Track.

Notice there is no Character (<none>) selected for the Character Track.
To define the Character affected by the Character Track:

The walkaround clip is added to the Character Track.
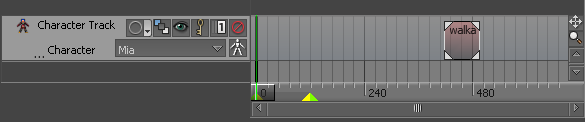

The values at the top left and right of the Walkaround clip (number "0" and number "78") indicate at what frame the clip starts and ends and the values at the bottom left and right of the Walkaround clip (number "0" and number "78") identify the original clip's start and end. Since the clip has not been modified, the top and bottom values are identical.
The number "78" at the top right of the Walkaround clip indicates at what frame number the clip ends and the number "78" at the bottom right of the Walkaround clip indicates the duration (in frames) of the Walkaround clip.
 ) or use the keyboard shortcut Shift-drag to pan the Character Track.
 ) or use the keyboard shortcut Ctrl-drag to zoom in and out of the Character Track.
After framing the Walkaround clip, the Character Track is highlighted in blue indicating it is selected, and the Walkaround clip is no longer shown as being selected.

At frame 0, the Mia’s right foot is in front and the left foot is in back. At frame 32, Mia’s right foot is flat on the ground and her left foot is slightly lifted. At frame 60, Mia is in almost in the same pose as she was at frame 32. At frame 78, Mia is turned. If you were to loop the animation at this point, there would be a jump in the walk cycle.
The following figure shows the default view (set to Producer Perspective) was orbited to show Mia from the front.
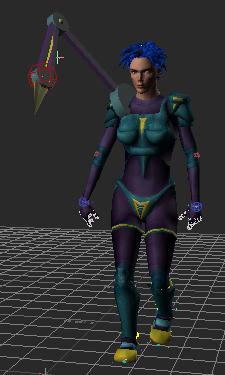
Mia at frame 32 shown in Producer Perspective View
The contour of selected clips is highlighted in green.

Since you plan to use only the middle part of the Walkaround clip, you need to slice the clip.

 ).
).
The Walkaround clip is sliced in two at frame 32.

Walkaround clip sliced at frame 32
The second half of the original Walkaround clip is highlighted in green indicating it is selected.
) to slice the second half of the original Walkaround clip.
The Walkaround clip is sliced at frame 60. There are now three clips.

Walkaround clip sliced into three clips
The third clip of the original Walkaround clip is highlighted in green indicating it is selected.

Walkaround clip starts at frame 0 and ends at frame 28
The values at the top left and right of the Walkaround clip (number "0" and number "28") indicate at what frame the clip starts and ends. The values at the bottom left and right of the Walkaround clip (number "32" and number "60") identify the original clip's segment that was sliced and that makes up this clip.
 Except where otherwise noted, this work is licensed under a Creative Commons Attribution-NonCommercial-ShareAlike 3.0 Unported License


 and click Play (
  ).
).
 ) to scrub through the animation.