You can set a texture to be a foreground or backdrop for a selected Camera:
- From the Asset browser
- From the Scene browser
- From the Camera settings
To add a new texture from the Asset browser:
- Drag a Texture asset from the Shading Elements folder in the Asset browser and drop it onto a camera in the Viewer. You can
also drop it onto the camera listed in the Scene browser.
- In the menu that appears, select either Selected Camera(s) Foreground or Selected Camera(s) Background.
A new texture is added to the scene.
- In the Scene browser, expand the Textures folder and double-click the new texture to display its settings.
- In the Texture settings, select New Media from the Media menu to open a file browser which lets you select the image to be
used as the camera’s Front or Back plane.
You can also use a video clip to project on the foreground/background plane. The new image or video clip is added to the Video
folder in the Scene browser.
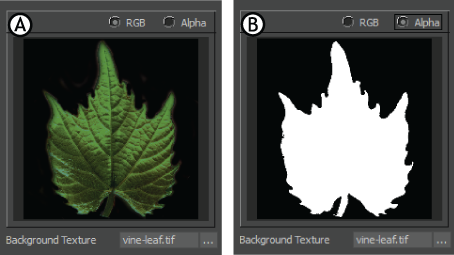
- Select either the RGB or Alpha options to preview either the RGB or Alpha channels of the loaded image.
To attach a texture already in the scene:
- Drag a texture from the Textures folder in the Scene browser and drop it onto a camera in the Viewer.
NoteYou can also drop it onto the camera listed in the Cameras folder in the Scene browser, or directly into the Background Texture
field in the Camera settings.
- In the menu that appears, select either Selected Camera(s) Foreground or Selected Camera(s) Background.
The texture is attached to the camera’s Front or Back plane, depending on the option you select.
To detach a texture from the Camera settings:
- In the Scene browser, expand the Cameras folder and double-click a camera to view its settings.
- Select either the Back Plate or Front Plate tab, depending on where the image is placed.
- Click on the Background Texture field, where the name of the texture appears.
- In the list that appears, select the texture, then click Remove.
The texture is detached from the camera’s Back Plate or Front Plate, but is not deleted from the scene.
 Except where otherwise noted, this work is licensed under a Creative Commons Attribution-NonCommercial-ShareAlike 3.0 Unported License