To select assets in a scene, click or double-click them in the Asset list of the Scene browser. When you select assets in the Asset list, three different colors indicate the selection and what displays in the Asset Settings area: The yellow outline indicates the asset’s settings are displayed in the Asset Settings area. The dark blue color identifies the asset’s branch. The light blue color identifies the selected asset.
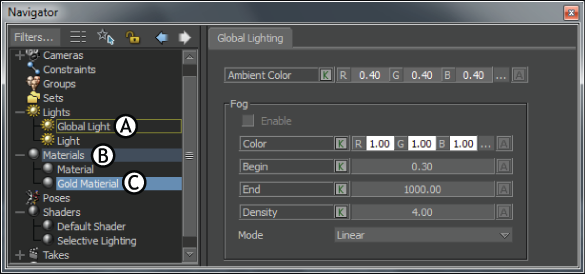
Asset list selection colors A. Yellow outline B. Dark blue C. Light blue
The following table describes the selection colors:
| Color | Indicates |
|---|---|
| Light Blue | The currently selected asset or folder. This is not necessarily the same asset appearing in the Navigator window. You can have more than one selected asset. |
| Dark Blue | At least one asset is selected within its folder or hierarchy. |
| Yellow Outline | The asset displays in the Asset Settings area of the Navigator window. Only one asset can display in each Navigator window. |
To select an asset within the same folder, click once to select and view the asset’s settings. For example, if the Producer Perspective camera is selected, click the Producer Top camera to select and display the Producer Top camera’s settings.
You can append an asset to an object in the scene, either in the Viewer window or in the Scene browser. For example, you can add a texture to a plane by dragging the texture asset over a plane. The Texture settings appear in the Navigator window, letting you set the texture’s properties.
 Except where otherwise noted, this work is licensed under a Creative Commons Attribution-NonCommercial-ShareAlike 3.0 Unported License


