When you use the Motion Blend window, you can blend takes with Match Selection. Match Selection matches the position and rotation of two ghosts based on their positions in a specific frame.
Use Match Selection to blend two tracks together when the blending object is in a different location, or facing a different direction on each track. You can also use it to blend together different parts of the same take, in which the character is in the same location for both tracks.
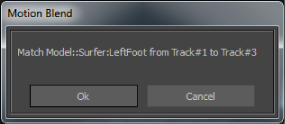
Match Selection matches the ghost whose node you select in the Viewer window to the corresponding node of the ghost whose Take box is selected. A dialog box appears asking if you want to match the selection.

Match Selection dialog box
You can match any ghosts in your scene, regardless of the order in which they appear in the Cut area. Match selection works with both poses and cuts.
Match Selection is always performed on the current frame and can be located anywhere on the Result track. It does not have to be within a blend.
Match Selection is not limited to using the blending object. It can use any part of a character, such as a bone, node, or sensor, to match the position and rotation of the character on each track.
You can override a Match Selection by performing another Match Selection using the same tracks. Since Match Selection can be done once per Result track, any other matching on the same Result track overrides the previous ones. If you need to match the position of ghosts more than once per result track, see Match Pivot for more information.
MotionBuilder rotates the character in the second track on the Y-axis and translates it along the X and Z-axes until the reference points of both characters match. The Match Selection is constrained to rotation in Y and translation on the XZ grid so that the matched character respects the floor. This ensures that the character does not end up diagonal to the floor.
Once the Match Selection is finished, you can fine-tune the match by translating or rotating the character using its root.