The following procedure shows you how to export a 3ds Max character to MotionBuilder.
Note This tutorial uses the
MotionBuilder and 3ds Max 2012 single-step interoperability workflows, using the
Send To menu option. If you do not have the 2012 versions of these products, refer to the
Export a 3ds Max character topic in the
MotionBuilder documentation.
To export the 3ds Max Pepe character:
- Launch the 3ds Max software.
- In the Application menu, choose Reset to clear the scene/settings.
- Select Open and open the Pepe.max scene file located in the MotionBuilder root directory under the Tutorials folder.
The Pepe.max scene file opens, displaying a biped skeleton inside a mesh.
- From the Application menu, select Send to > Send to MotionBuilder > Send as New Scene.
NoteIf you do not have the 2012 versions of MotionBuilder and 3ds Max, you do not have access to the Send to option. Refer to the MotionBuilder documentation.
- MotionBuilder launches and the Pepe character appears in the Viewer window.
- Position your cursor anywhere in the Viewer window and press A to frame all of the character.
To characterize your Character:
- In the Viewer window, press Ctrl-A until you are in X-Ray mode.
X-Ray mode lets you see through the character skin to the skeleton underneath.
- In the Asset browser, expand Templates > Characters and drag the 3ds Max Biped Template asset on top of the Pepe Character
skeleton.
The 3ds Max Biped template is specially designed for bipeds created in 3ds Max as they have a different naming structure that
the MotionBuilder Character does not recognize automatically.
- Click Characterize in the menu that appears.
- In the MotionBuilder menubar, select Window > Characterization Tool. The Characterization Tool lets you verify that are no problems with the Control
rig you matched to the skeleton.
The Characterization tool shows green if the characterization is correct, yellow if potential problems are detected, and
red if there is an element of the skeleton matching that is incorrect.
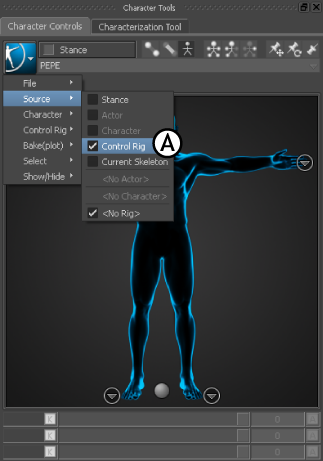
- From the Character Controls window, select > Control Rig > Source Control Rig.
You must use the Control Rig Input setting if you intend use keyframe animation on your biped.
- In the Create Control Rig dialog box, click FK/IK.
FK/IK is the method commonly used to animate characters.
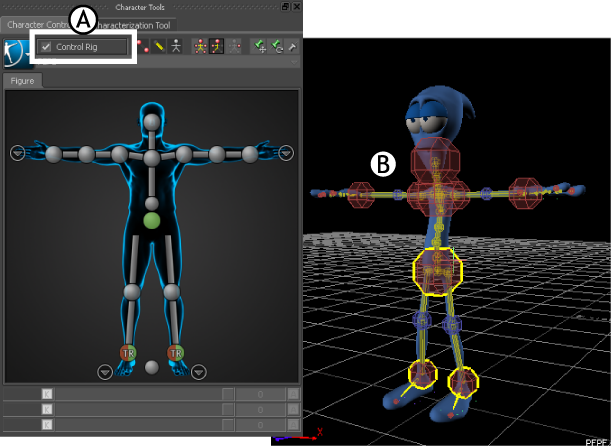
- In the Character Controls window, select Source > Control Rig.
Effectors appear on the biped as shown in the following figure.
-
The Character representation is a human form, meant to represent the character’s skeleton. It displays all the effectors
you need to animate the biped's Control rig. The biped is now rigged and ready to receive animation.
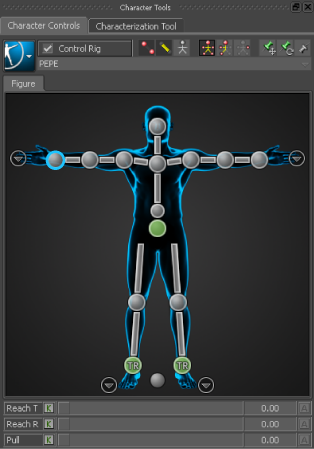
- Select Full Body mode in the Character controls. Full Body mode lets you control the entire rig, instead of individual body
parts.
- On the Character representation, select the Right Wrist effector.
- Click in the Viewer window and press T.
The transformation handles display.
- Translate (or move) the hand down as shown in the following figure.
Notice as you move the hand, the arm extends and the rest of the body follows in a natural movement.
You can now animate your character with motion capture and key frame animation.
- Navigate to a directory other than the default MotionBuilderTutorials directory and save the file as My_Pepe_rigged