Navigate to Window > Rendering Editors > Hardware Render Buffer.
The Hardware renderer, with its greater capabilities, is now recommended to perform hardware rendering. See Maya Hardware renderer.
The Hardware Render Buffer lets you render an animation using your computer’s display graphics card. Hardware rendering is much faster than software rendering, although the result may be of lower quality. You can use the Hardware Render Buffer to preview animations, or to render specific types of particle effects.
Render Sequence will not render particles successfully if the Render Passes and “Motion Blur” options (found in the Multi-Pass Render Options section of the Hardware Render Buffer Attribute section) are equivalent integers. For example, if Render Passes is set to 3 and Motion Blur is set to 3, hardware particle rendering will not work.
Set them to non-equivalent values or to use the Disk Cache option (Solvers > Create Particle Disk Cache).
To work around this limitation, temporarily set the overscan to 1.0 when hardware buffer rendering.
To open the Hardware Render Buffer
To set options for the Hardware Render Buffer
The Hardware Render Buffer renders images based on your monitor’s display (using screen captures). Before rendering from the Hardware Render Buffer, make sure the Hardware Render Buffer fits on your monitor, make sure no other window overlaps the Hardware Render Buffer, and disable your computer’s screen saver.
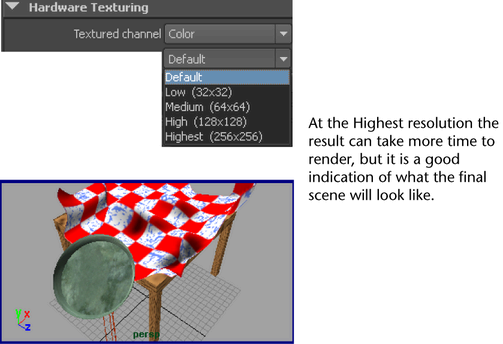
To determine hardware rendering quality
The Flipbook lets you play back a rendered sequence of images. The sequence is displayed using the fcheck utility.
To play back a rendered sequence of images
 Except where otherwise noted, this work is licensed under a Creative Commons Attribution-NonCommercial-ShareAlike 3.0 Unported License


