XGen interpolation is a useful concept to understand when using guide interpolation with your Description. This section provides additional information about using guides and how XGen calculates primitive position and shape using an interpolation algorithm.
When placing guides, you can be aware of the following:
When you use the spline primitive, you can make every guide have a different CV count. You can also delete CVs from the guide or rebuild it to a higher count. use more guides where you need them and less where you do not.
It is not required, but it is good practice to keep the guide distribution (at least locally,) uniform. Ensure you have guides around the boundary of your primitives. You do not need a dense line of guides, but if you try to generate primitives outside of your guides, XGen must extrapolate your guides instead of interpolate them, which returns inferior results and is generally more difficult.
The following image represents a collection of guide locations:
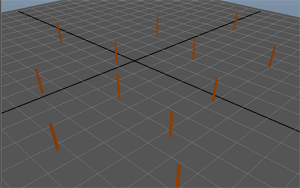
The XGen algorithm first determines all the neighbors of each guide by detecting Vornonoi edges that separate guide-defined regions.
XGen starts with four points on the corner of the face and evaluates which guides are closest. If all the guides are similar, there is nothing of interest on that face and there is nothing more to be done. If any of the four guides differ, the box is divided into four and the evaluation is repeated. The box is divided and sub-divided until XGen reaches a sufficient “resolution”, based on the density of the local guides. The guide values found at these final four points determines the neighbors. Any two points that differ are neighbors as they equate to different sides of the Voronoi edge that separates the regions for those guides.
Once the neighbors are located, XGen now defines a guide range-of-influence region around each guide by constructing a sweep from one guide to its neighbor and interpolating the distance between them. These distances form the radii for the guide range-of-influence around the guide. Note that this is not a triangulation of the guides. With this approach you do not get an edge that connects two guides, resulting in only two guides controlling the shape of a primitive. Instead, you will have regions that overlap along that same area, letting neighboring guides blend across that boundary smoothly.
The following image represents a few examples of some guide range-of-influences found in our example.
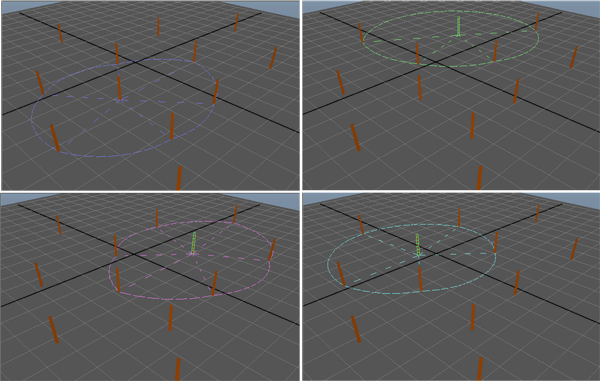
The guide range-of-influence information stored with each guide is a collection of sweep angles and radii, appearing in Maya as a single-string attribute that you can also view in the XGen palette file. You cannot edit a guide range-of-influence, but you can add guides until you get the ideal result.
The illustrations here show the how XGen intuits what area a guide controls; it looks near the guide and defines an imaginary fence that connects the guides that surround it.
There are three parts to the interpolation workflow:
As an example, say you want to generate a primitive at the location given by the yellow ‘x’ in the image.
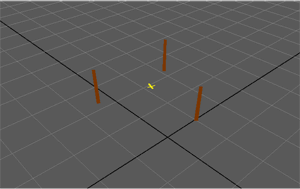

XGen locates the guides it will use by computing the guide range-of-influence shapes that the primitive falls within. It has optimization techniques that eliminate a large majority of the guides so it can focus on the important ones. XGen also eliminates guides based on curvature (that is, on wrong side of the model) and region maps. In this example XGen determines that the red, blue, and green guides are the ones that must remain active.
XGen determines weights for these guides by intersecting a ray formed from the guide through the primitive with the guides range-of-influence. This images shows the weights being computed for the primitive.

Note that the distance from the boundary is what XGen uses as the weight for that guide, so the closer you are to the guide's range-of-influence boundary, the lower the weight of that guide. Conversely, the farther you are from the guides range-of-influence boundary, the greater its weight.
Once all guide weights are computed, they are normalized so they can be used for computing the primitive shape.
Once XGen has identified the active guides, they can be interpolated. Each active guide is translated to the primitives location. If necessary, XGen rebuilds each guide to the same number of CVs (for example, for the spline primitive). For each CV, XGen uses the weighted average of the guides that use the weights we calculated previously.
This process referred to as relative interpolation. Relative interpolation is good for fur, grass, and similar things even if they have sparse guide placement. Relative interpolation also works well for hair when there is a slightly higher number of guides. It is important to be aware that you cannot use only ten guides on a head model and expect a good result. The relative interpolation approach requires that there be very little surface curvature between guides.
A little experimentation helps to find a working density of guides. This density may be higher than what you have used in previous versions of XGen, but the results are more predicable and intuitive.
When you groom fur, sometimes the interpolation is too exact and you cannot achieve a smooth look because XGen matches your guides exactly. Sometimes this occurs even if you add extra guides, which is good practice, but with fur you may not want to manage many guides just to maintain a smoother look. If this is the case, use the Blend attribute. The Blend attribute lets you enlarge the range-of-influence on your guides, causing them to blend with their neighbors.
If you select a collection of guides and set all of their blend values to a value greater than zero, they blend into their neighbors, smoothing the area. This attribute is performed per-guide which lets you set a value that looks good across your element. For example, you might set the Blend attribute to 0.2 in the face to keep some definition, but everywhere else set it to 0.8 to soften the look. Then, select the area between the face and body and set the value to 0.5 to smooth the transition area.
XGen has tool that you can use to visualizing a guide's range-of-influence. After you preview/render/export, XGen creates a connectivity.xgc file in your ${DESC} folder that holds all the connectivity information for that description. While XGen does not use any of the connectivity/neighbors internally, this information is useful for simulation purposes as well as for debugging and visualization.
Click Guide > Display Guide Range-of-Influence to use that file to draw the guide range of influence and connectivity in for you in unique colors per guide. By default, the full connectivity of the description is shown, but if you want, you can limit the display by selecting guides.
 Except where otherwise noted, this work is licensed under a Creative Commons Attribution-NonCommercial-ShareAlike 3.0 Unported License


