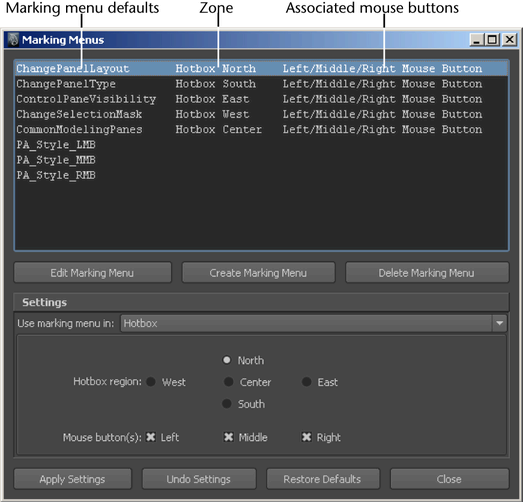
Lets you edit the available marking menus. Once you define a marking menu, you must assign it to a hotkey or add it to the hotbox before you can use it. Navigate to Window > Settings/Preferences > Marking Menu Editor to access the editor.
In this dialog box, you can set the menu name and test your marking menu. To edit items within a marking menu,  -click on a marking menu icon and select Edit Menu Item.
This editor appears when you edit a marking menu item.
Turn Option Box on to display the option box  beside the menu item so you can change a tool’s options from the marking menu.
If the tool or action does not have an options window, you must use MEL code to create the box. Once the box is created, you must write MEL code to invoke the option window. For more information on MEL commands, see Run MEL commands.
For more information, see Hotkey editor.
Enter the key you want to assign to the selected command. Enter a letter from A to Z (upper and lower case are different keys) or a number from 0 to 9. You cannot use more than one letter or number.
Or, select a special key from the pull-down list. For example, if you want the right arrow key to act as the trigger, assign it here.
Use Press or Release to associate a command with the press or a release of a key. For example, you can create a hotkey to instruct Maya to snap to a curve when you press a key, then turn off the snapping when you release it.
If you added a key to an operation ending with (Press) or (Release), add the same key to the corresponding (Release) or (Press) operation.
Turn on so that this hotkey can appear in the Edit > Recent Commands List window.
 Except where otherwise noted, this work is licensed under a Creative Commons Attribution-NonCommercial-ShareAlike 3.0 Unported License


 (Windows and Linux)/
 (Mac OS X) or
  or
or  (Mac OS X) for the hotkey modifier.