You can add a custom attribute to a particle shape node and control its value in an expression.
The Add Attribute window appears:
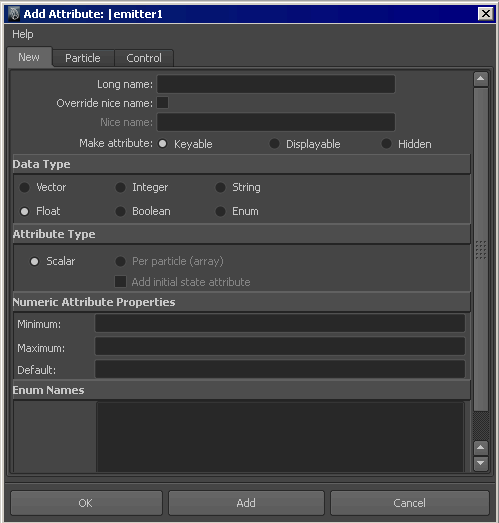
Minimum and Maximum set the lowest and highest values you can enter for the attribute in the Attribute Editor or Channel Box. Default sets the default value displayed for the attribute. Because you’re going to control the attribute’s value with an expression, you might want to skip entering values for these options.
An expression isn’t bound by the Minimum and Maximum values. The attribute receives whatever value you assign it in the expression. The expression can read the attribute’s Default value or any other value you give it in the Attribute Editor or Channel Box.
When you select Scalar, you can’t create a counterpart initial state attribute by turning on Add Initial State Attribute.
You can’t set Minimum, Maximum, or Default values for an Array attribute.
The new attribute appears under the Extra Attributes section of the Attribute Editor. Although the attribute name is always spelled with an uppercase first letter in the Attribute Editor, you must use the exact spelling shown in the Expression Editor, whether lowercase or uppercase.
To assign values to a custom attribute
Suppose you’ve created a 10-particle object named sunspot, and you add to its particle shape node a float scalar (per object) attribute named glow. You assign the glow attribute a value in a creation expression as follows:
sunspotShape.glow = 11.5;
print (sunspotShape.glow + "\n");
When you rewind the animation, the glow attribute of sunspotShape receives the value 11.5. The print statement displays the value in the Script Editor. The value appears 10 times because the expression executes once for each particle in the object.
Suppose you add a vector array (per particle) attribute named heat to the 10-particle sunspot shape node. You can give each particle a different value as in this creation expression:
float $randomNumber = rand(1);
sunspotShape.heat = <<$randomNumber,0,0>>;
print(sunspotShape.heat + "\n");
When you rewind the animation, the expression loops through 10 executions, once for each particle.
The first statement sets the $randomNumber variable to a random number between 0 and 1. The next statement assigns a vector to the heat attribute of a single particle. The left component of the vector assigned to heat is a different random number each time the statement executes. The middle and right components are always 0.
One particle might have the value <<0.57, 0, 0>>, another <<0.32, 0, 0>>, another <<0.98, 0, 0>>, and so on.
The print statement displays the values in the Script Editor.


