Publishing a node attribute to an asset makes that attribute visible at the asset level. A published attribute consists of three parts:

You can modify published attributes as though you were modifying the values of the corresponding encapsulated attributes directly. This allows you to:
Published attributes make up the asset’s interface and are still editable when a asset is locked. Thus, by publishing a set of attributes and then locking the asset, you can ensure that users are only able to interact with the contents of that asset through the published attributes you give them.
If a published name on an asset exists but is not connected to an internal node attribute, the published name is unbound. Modifying unbound attributes has no affect on the asset’s contents. You can bind and unbind attributes to published names with the Asset Editor.
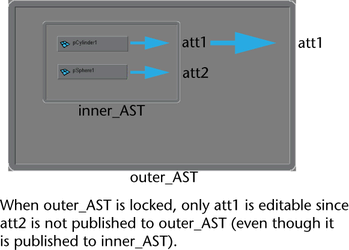
You can publish published attributes from a child asset to a parent asset. This allows you to build asset hierarchies to better manage your scenes.

For example, in a car scene you may create an asset for the front wheels named front_wheel_AST that is encapsulated by the asset for the entire car named car_AST. You can then publish the wheels’ rotation first to front_wheel_AST and then publish those published attributes to car_AST.
You can also publish an asset node’s own attributes to itself. This is useful if you want to allow an artist to change views or control other asset attributes when the asset itself is locked.
Templates use published names to define what published attributes it requires.
You can also publish nodes. For more information, see Published Nodes.
Like publishing attributes, you can publish a node to an asset. For either type of asset, published nodes are the only encapsulated nodes that can be seen (in the Outliner, Attribute Editor, and Channel Box), selected, and manipulated when an asset is in Black Box mode.
For advanced assets specifically, published nodes can also be used to define the way encapsulated DAG nodes interact with external DAG nodes in the hierarchy. In addition to the generic node publishing common to both types of assets, advanced assets allows you to publish a DAG node three different ways:
A parent anchor or child anchor identifies, respectively, that a node in an advanced asset is allowed to be the parent or child of a node outside the asset. A selection transform functions as the node selected in an asset centric selection (for more information, see Asset centric selection) and is useful for directing the user to the primary node in the asset.
Here are a few common ways of publishing nodes for an asset:
The Create Asset options window provides options for auto-publishing a root this way upon creation. For more information, see Create assets.
Maya handles published node parent relationships differently compared to other relationships during file input and output. Rather than using the node’s name directly, parent anchors and child anchors rely on the published name of the parent/child to manage the relationship between objects. This is especially useful when working with file referencing.
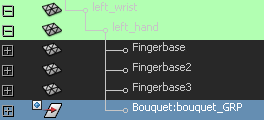
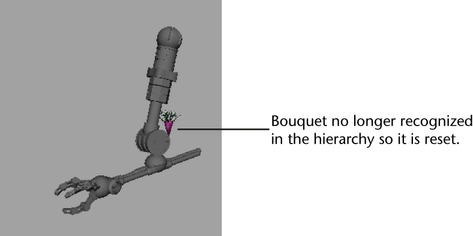
For example, suppose you reference a file with a bouquet and parent it to an arm in the parent file.


If you alter the hierarchy or name of the bouquet file, Maya is unable to maintain the relationship between the arm and the bouquet in the parent file since the DAG path has changed. as a result the bouquet loses all its relationship data and is reset to the origin.


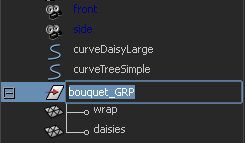
You can avoid this problem by encapsulating the bouquet in an asset and publishing bouquet_GRP as a child anchor. Then you can change the names and structure of the bouquet without affecting the relationship to the arm.
Hiding non-published attributes and nodes
Published attributes and nodes represent parts of the asset you want to give users access to. You can hide the rest of the attributes and nodes in an asset by setting it to Black Box mode (for more information on Black Box mode, see Hide unpublished nodes and attributes).
However, even though you cannot see these attributes and nodes, it is still possible to modify them. To prevent this, you can also lock the asset. When an asset is locked, you can only parent/child published nodes and modify published assets (for more information on locking assets, see Lock an asset).
By using these two features together, you can ensure that users only interact with your assets in the ways you intended.