Sets the options when creating a shatter effect. You can create a surface shatter, solid shatter, or crack shatter effect. Here are the options:
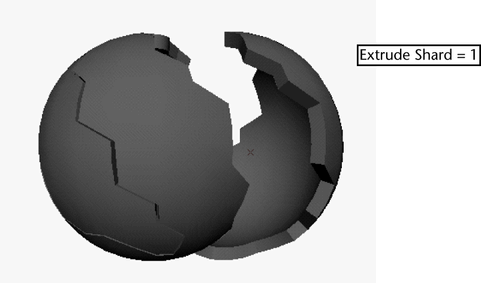
Specifies a thickness for the shards. A positive value pushes the surface outward to create thickness; a negative value pushes the surface inward. You can edit the extrusion amount after you create the shatter, see Change the extrusion value of a shard.

The post operation options determine what kind of shard you create. The options vary slightly according to the type of shatter you have selected. Select one of the following from the pop-up menu:
(Available for Crack Shatter only.) Creates crack lines without actually breaking the object. You can use this option to quickly find crack patterns you like, then repeat the crack shatter using the desired post operation option.
To do this, you pick the same vertex each time while changing the Seed Value to values greater than 0. To repeat the same cracks, set the Seed Value to the same value it was for the desired cracks, and pick the same vertex.
Breaks the object into rigid bodies. Collisions are turned off to prevent interpenetration errors from occurring while the shards are touching. You can apply dynamic forces to move the shards, and turn collisions on when the shards are no longer touching (see Connect shards to fields).
For complete information on effects you can create with rigid bodies, see Rigid bodies.
Breaks the object into soft bodies, which deform when you apply dynamic forces. The software also adds goal objects, which are copies of the shards that you can use to more precisely control the soft body deformations. A goal weight of 1 forces your shards to maintain their original shape. See Set goal weights on soft-body shards for more information. Springs are also created, which add internal structure to the soft bodies and improve your control over the deformation.
For complete information on effects you can create with soft bodies, see Soft bodies. For complete information on effects you can create with goals, see Goals. For complete information on springs, see Springs.
Breaks the object into shards. The software adds a lattice deformer to each shard and makes the lattices soft bodies. When lattices are soft bodies, they can be affected by fields. The lattices deform the shards according to the fields affecting the lattices.
Goal objects are also added, which are copies of the lattices that you can use to more precisely control the soft body deformations. A goal weight of 1 forces your lattices to maintain their original shape. See Set goal weights on soft-body shards for more information. In addition, springs are added to the lattices, which add internal structure to the lattices and improve your control over the deformation.
Using lattices to deform your shards can be faster, especially if you have complex geometry. It’s also easier to add springs to lattices, creating a more uniform jiggliness. However, it you want the shards to collide, you may get unrealistic results because the collisions occur between the lattices, not the shards.
For complete information on effects you can create with soft bodies, see Soft bodies. For complete information on effects you can create with goals, see Goals. For complete information on springs, see Springs. For complete information on lattices, see What are lattice deformers? in the Deformers guide.
(Available for Surface and Crack Shatters only.) Puts the individual faces that make up the shard into sets called surfaceShatter#Shard#. When you choose the Sets option, Maya doesn’t actually break up the object; it merely puts the polygons of each shard into sets.
You can use these sets as you would any other set in Maya. For example, you can assign different colors to the sets (see Assign shaders to sets).
Creates several connections from the original surface to the shards. This option lets you control the visibility of the original surface and the shards with one attribute on the original surface’s transform node.
See Link original surface to shards for more information.
Makes the original object an active rigid body. This option is available only when you have selected rigid bodies as the post operation and turned on Link to Shards. See Link original surface to shards for more information.
See, Shard Count.
See Seed Value.
See Post Operation.
See Extrude Shards.
See Triangulate surface.
Creates a new default material called shatterinteriorSG# and applies this shader to the inside surfaces of the shards. The exterior already has the default initialShadingGroup or whatever shader you had on the original object applied to it.
You can use the HyperShade window to edit the material. This option lets you have different shaders on the inside surfaces and outside surfaces of your shards.
See Original Surface.
See Link To Shards.
See Verbose Mode.
See Edge jagginess.
See Extrude Shards.
See Seed Value.
See Post Operation.
See Triangulate surface.
See Original Surface.
See Link To Shards.
See Verbose Mode.