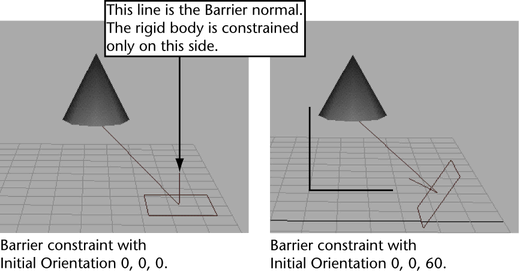
A Barrier constraint creates an infinite barrier plane beyond which the center of mass of the rigid body will not move. You can use a Barrier constraint to create objects that block other objects, for instance, a wall or floor.
You can save processing time by using this type of constraint in place of a collision effect. However, objects will deflect but not bounce off the plane. To constrain multiple objects, you must create a Barrier constraint for each object.
This constraint works only with a single active rigid body; it does not constrain a passive rigid body.
To create a Barrier constraint
 to display the options window.
If you don’t turn on Set Initial Position, the Barrier plane is created at the origin and connected to the center of mass of the selected rigid body. The barrier plane is oriented on the XZ plane.
By default, the Barrier constraint is oriented on the XZ plane.
An square icon appears in the workspace at the Barrier plane position.
A perpendicular line sticking up from the Barrier plane icon indicates the normal direction of the plane surface. Only this side of the surface constrains the rigid body.
To alter the constraint after creation, see Edit constraints.
