Skinning a cylinder by smooth skinning


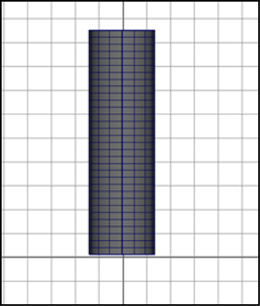
This example is similar to Skinning a cylinder by rigid skinning, so that you can compare smooth skinning with rigid skinning.

To create the cylinder

  1. Create a NURBS cylinder with the following options:
    • Height: 8
    • Sections: 16
    • Spans: 32

To create the skeleton for the cylinder

  1. Build a skeleton for the cylinder. Have the skeleton consist of a single joint chain with about seven joints.

    This skeleton consists of one joint chain (joint1 through joint7). Joint4 starts approximately in the center of the cylinder.

To bind by smooth skinning

  1. Select skeleton root joint (default name: joint1).
  2. -select the cylinder.
  3. Select Skin > Bind Skin > Smooth Bind.

To exercise skeleton

  1. Select the joint approximately at the center of the cylinder (for instance, joint4) and rotate it about 90 degrees.

To paint creasing effects

  1. Select smooth shaded display mode (hotkey: press 5).
  2. Select the cylinder.
  3. Select Skin > Edit Smooth Skin > Paint Skin Weights Tool > .

    The Paint Skin Weights Tool displays. The Influences list displays the names of all the joints.

  4. In the Influences list, click joint4.

    Black and white visual feedback displays on the mesh to show you the influence joint4 has on the cylinder mesh.

  5. At the bottom of the Paint Skin Weights Tool, turn on Use Color Ramp.

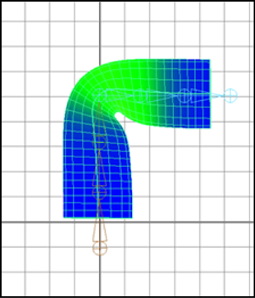
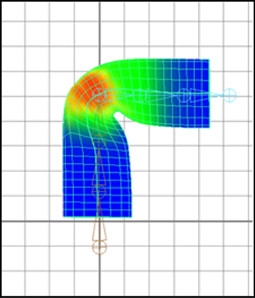
    The cylinder mesh now displays weight value feedback in color, making it much easier to see areas of the mesh with small weight values.

  6. Use the Paint Skin Weights Tool’s brush to paint how the joints influence creasing.

    Painting the influences of nearby joints lets you edit the deformation effect.