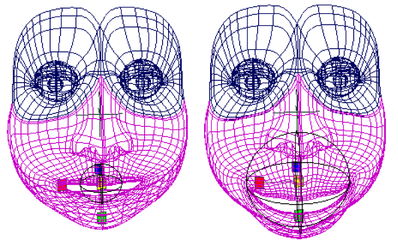
Sculpt deformers are useful for creating any kind of rounded deformation effect. For example, in setting a character for facial animation, you could use sculpt deformers to control the character’s chin, brow, or cheek actions.
With sculpt deformers, you can deform objects with a spherical influence object called a sculpt sphere, or any NURBS object you create.
You can use the following objects as sculpt tools: an implicit sphere or a NURBS object.
The implicit sphere is the spherical wireframe influence object you manipulate to create deformation effects. The implicit sphere’s deformation effects depend on the mode of the sculpt deformer.
In addition to the sculpt sphere, you can also use a secondary NURBS object as the sculpt tool. Using a NURBS object as your sculpt tool is also referred to as using the custom sculpt tool. See To use a NURBS or polygon object as the sculpt tool for your sculpt deformer.
A sculpt deformer in flip mode has an implicit locator in the center of the sculpt tool. When the sculpt tool is near the geometry, deformation occurs. This mode is called flip mode because as the center of the sculpt tool passes through the surface, the deformed surface flips to the other side of the sculpt tool.
In project mode the sculpt deformer projects the geometry onto the surface of the sculpt tool. The extent to which the projection takes place depends on the sculpt deformer’s Dropoff Distance attribute.
While the Dropoff Distance specifies the extent of the projection directly onto the sculpt tool, the Max Displacement attribute specifies whether the projection takes place directly onto the sculpt tool, inside the sculpt tool, or outside of the sculpt tool.
With a Max Displacement of 1.0, the projection takes place on the surface of the sculpt sphere. This is the effect you would usually want to achieve with project mode. However, by changing the Max Displacement you can displace the projection from the surface of the sculpt sphere. With a Max Displacement between 0 and 1.0, the projection takes place within the sculpt tool. With a Max Displacement greater than 1.0, the projection takes place outside of the surface of the sculpt tool. With a Max Displacement of 0, the geometry is projected into the center of the sculpt tool.
With a Max Displacement of less than 0, the projected geometry turns inside out as it is projected through the center of the sculpt sphere.
In stretch mode, as you move the sculpt sphere away from the geometry, the affected surface of the geometry stretches or bulges to stay with the sculpt sphere. The stretch direction extends from the point marked by a stretch origin locator to the surface of the sculpt sphere.
When you create a sculpt deformer in stretch mode, you can select and move the stretch origin locator as you do any object, or parent it to the sculpt tool and move them in combination. Depending on the effect you want to create, you could also parent the locator to some other object in the animation.


