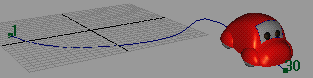
When you create a path animation, you’ll notice that markers with numbers are drawn along the path curve. These are motion path markers, and each one represents a key of an animation curve. The time of the key is the number drawn on the marker.
There are two types of motion path markers: position markers and orientation markers. Position markers are created when you select Animate > Motion Paths > Attach to Motion Path or when you use motion path keys. Orientation markers can be created to refine the automatic rotations that are computed for the object when the Follow option is used.

The value of a position marker is the U parameter value (or percentage of the curve, if the path animation is in Fraction Mode,) of the marker’s position on the curve. The value of an orientation marker is the amount of rotation for its Twist parameter.
Markers display in both the scene view and graph editor. This is very useful for editing the timing of path animation, and this saves having to open the Graph Editor to edit the timing of the path animation’s curve.
After creating the path animation, you may find that you would like the object to travel a little further or not so far along the curve at a given marker time. You can make this adjustment by changing the position of the marker along the curve. See Animate an object along a surface.
Orientation markers represent keys for the Front, Side, and Up Twist attributes of the motion path node. These Twist attributes are rotations that are added to the default rotations computed by the path animation when you use the Follow (and optionally Bank) option.
Creating your own orientation markers is useful if you want to refine the default rotations computed by the path animation. See Orient an object on a path.


