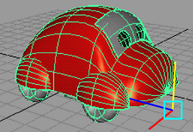
A path animation can use a curve-on-surface as the path curve. The workflow is identical to that when the curve is in world space; however, there is extra flexibility in controlling the “up” orientation of the object.
 -click the curve-on-surface.
 .
.
The Attach to Motion Path Options window appears. See Animate > Motion Paths > Attach to Motion Path.
The Attach Motion Path Options window closes.
The Attach Motion Path Options window remains open.
You may also wish to turn on the Inverse Up option, depending on the direction of the normals to the surface, and which side of the surface you want your object to be animated along. If you don’t know which side the surface’s normals point, you can always turn the Inverse Up option of the motion path on or off after the path animation is created.
You can make the animation even more complex by animating the CVs of the curve-on-surface or by creating a lattice or cluster deformer on the surface and animating this deformer object. The object animated by the path animation will stay normal to the surface at all times.
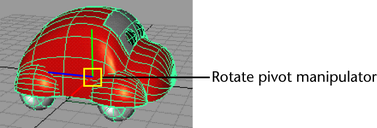
To position an object on a path

 (Linux and Windows) or
  (Mac OS X) key to select the rotate pivot of the current object.

 (Linux and Windows) or
  (Mac OS X) key again to exit from the rotate pivot selection and return to object selection.
You can now attach your object to a curve to create your path animation. See Create a motion path using a curve.
The positioning may not seem intuitive, however, as it will appear as if the object is moving instead of the rotate pivot, as you move the rotate pivot. This is because the motion path is continually recomputing and repositioning the object so that the rotate pivot will stay on the path curve.