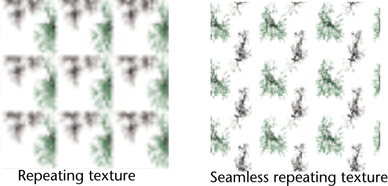
A repeating texture is a texture created by tiling or repeating an image in a grid. A seamless repeating texture is one where you cannot see the border of each tile because the images match continuously at each tile
edge (like aligning a wallpaper pattern at the edges of the paper).
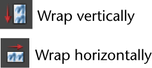
You can create seamless repeating textures in using the wrap feature. The wrap feature enables you to paint across the edge of a canvas and have that stroke continue on
the opposite edge, as if the canvas were wrapped into a cylinder and joined at the edges. You can wrap the canvas vertically,
horizontally, or both.
To create a seamless repeating texture
- Create a new file texture. For details, see the Shading guide.
- Using the middle mouse button, drag the new file texture from onto the canvas. The window opens.
- Type a name for the new image in the box or click the folder icon and select an existing texture. By default, the image will be stored in the sourceimages directory
for the current project.
- Set the canvas size, if necessary. For textures, you typically use a square canvas (for example, 256 x 256 pixels, or 512
x 512).
- Click the box to open the , select the background color for the image, and then click . For information on using the , see the Basics guide.
- Click .
- Do one of the following:
- In the window (Paint Effects > Paint Effects Globals), make sure the appropriate Wrap options are turned on. Turn on to wrap the canvas horizontally, to wrap the canvas vertically.
- On the canvas toolbar, click the appropriate wrap button(s).
- Paint the canvas. For information on painting the canvas, see Paint on the canvas. When you paint over the wrapped edges, the brush stroke continues on the opposite edge.
- Open the file texture in the , click the place2dTexture node tab, then expand.
- Turn on and , as appropriate to replicate the texture outside the coverage area in the U or V directions, or both.
- In the fields, type the number of copies of the texture map you want mapped within the coverage area along either the U or V parametric
surface directions or both.
The texture will wrap seamlessly on any objects its shader is attached to.
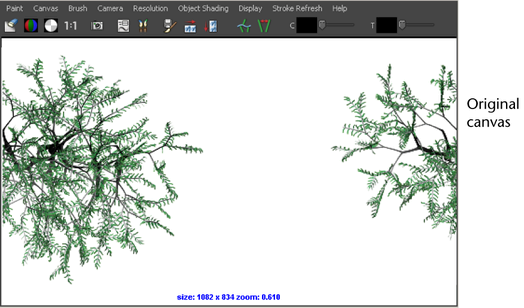
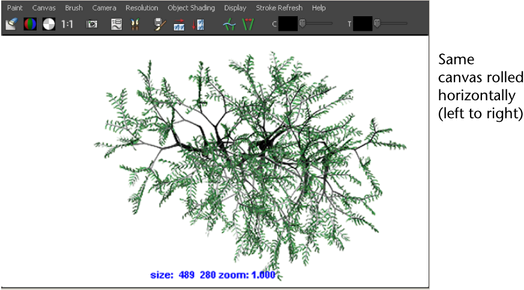
Roll the canvas
If you wrap the canvas, you may want to display the area where the edges join. You can do this using the roll feature. The
roll feature rolls the canvas as if it were wrapped into a cylinder, so that the images move continuously from left to right,
or from top to bottom.
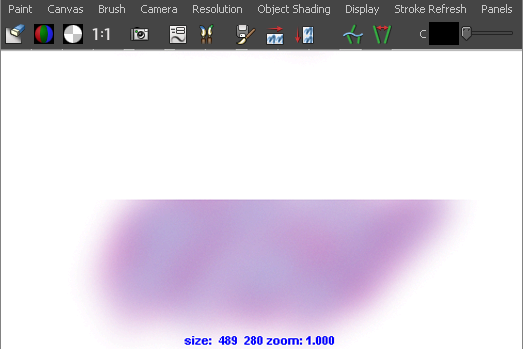
This feature is also useful if you do not use the wrap function but want to correct any seams created at the edges of the
canvas. In the following example, the canvas was rolled 50% vertically (top to bottom). The seam can now be corrected easily
using an airbrush.
To roll the canvas
- Select and select one of the following menu items:
- ,
-
Roll the canvas from left to right a distance 50% or 25% of the width of the canvas.
-
-
Roll the canvas from right to left a distance 25% of width of the canvas.
-
-
Roll the canvas from bottom to top a distance 50% or 25% of the height of the canvas.
-
-
Roll the canvas from top to bottom a distance 25% of the height of the canvas.